Have you ever used a 6"x 6" piece of Designer Series Paper with a beautiful scene, but had to cut it to fit your card, and missed out on using the entire scene?
Well here's a way to capture the beauty of the full panel (well almost!) and use it on your card:

But wait! You said you wanted the entire sheet of DSP, right? OK, hold on, just a sec.
Start with a piece of cardstock measuring 5-1/2" x 8-1/2" (standard card size). Score it at 2-1/8" and 4-1/4".
Trim your pretty DSP (a 6" x 6" sheet) to 5-1/4" x 6" (be sure to trim ONLY the bottom OR the top of the scenic paper), and then cut it into 2" strips.
Adhere the left-most 2" piece of the DSP to the cardstock on the 2-1/8" x 5-1/2" strip. Then:
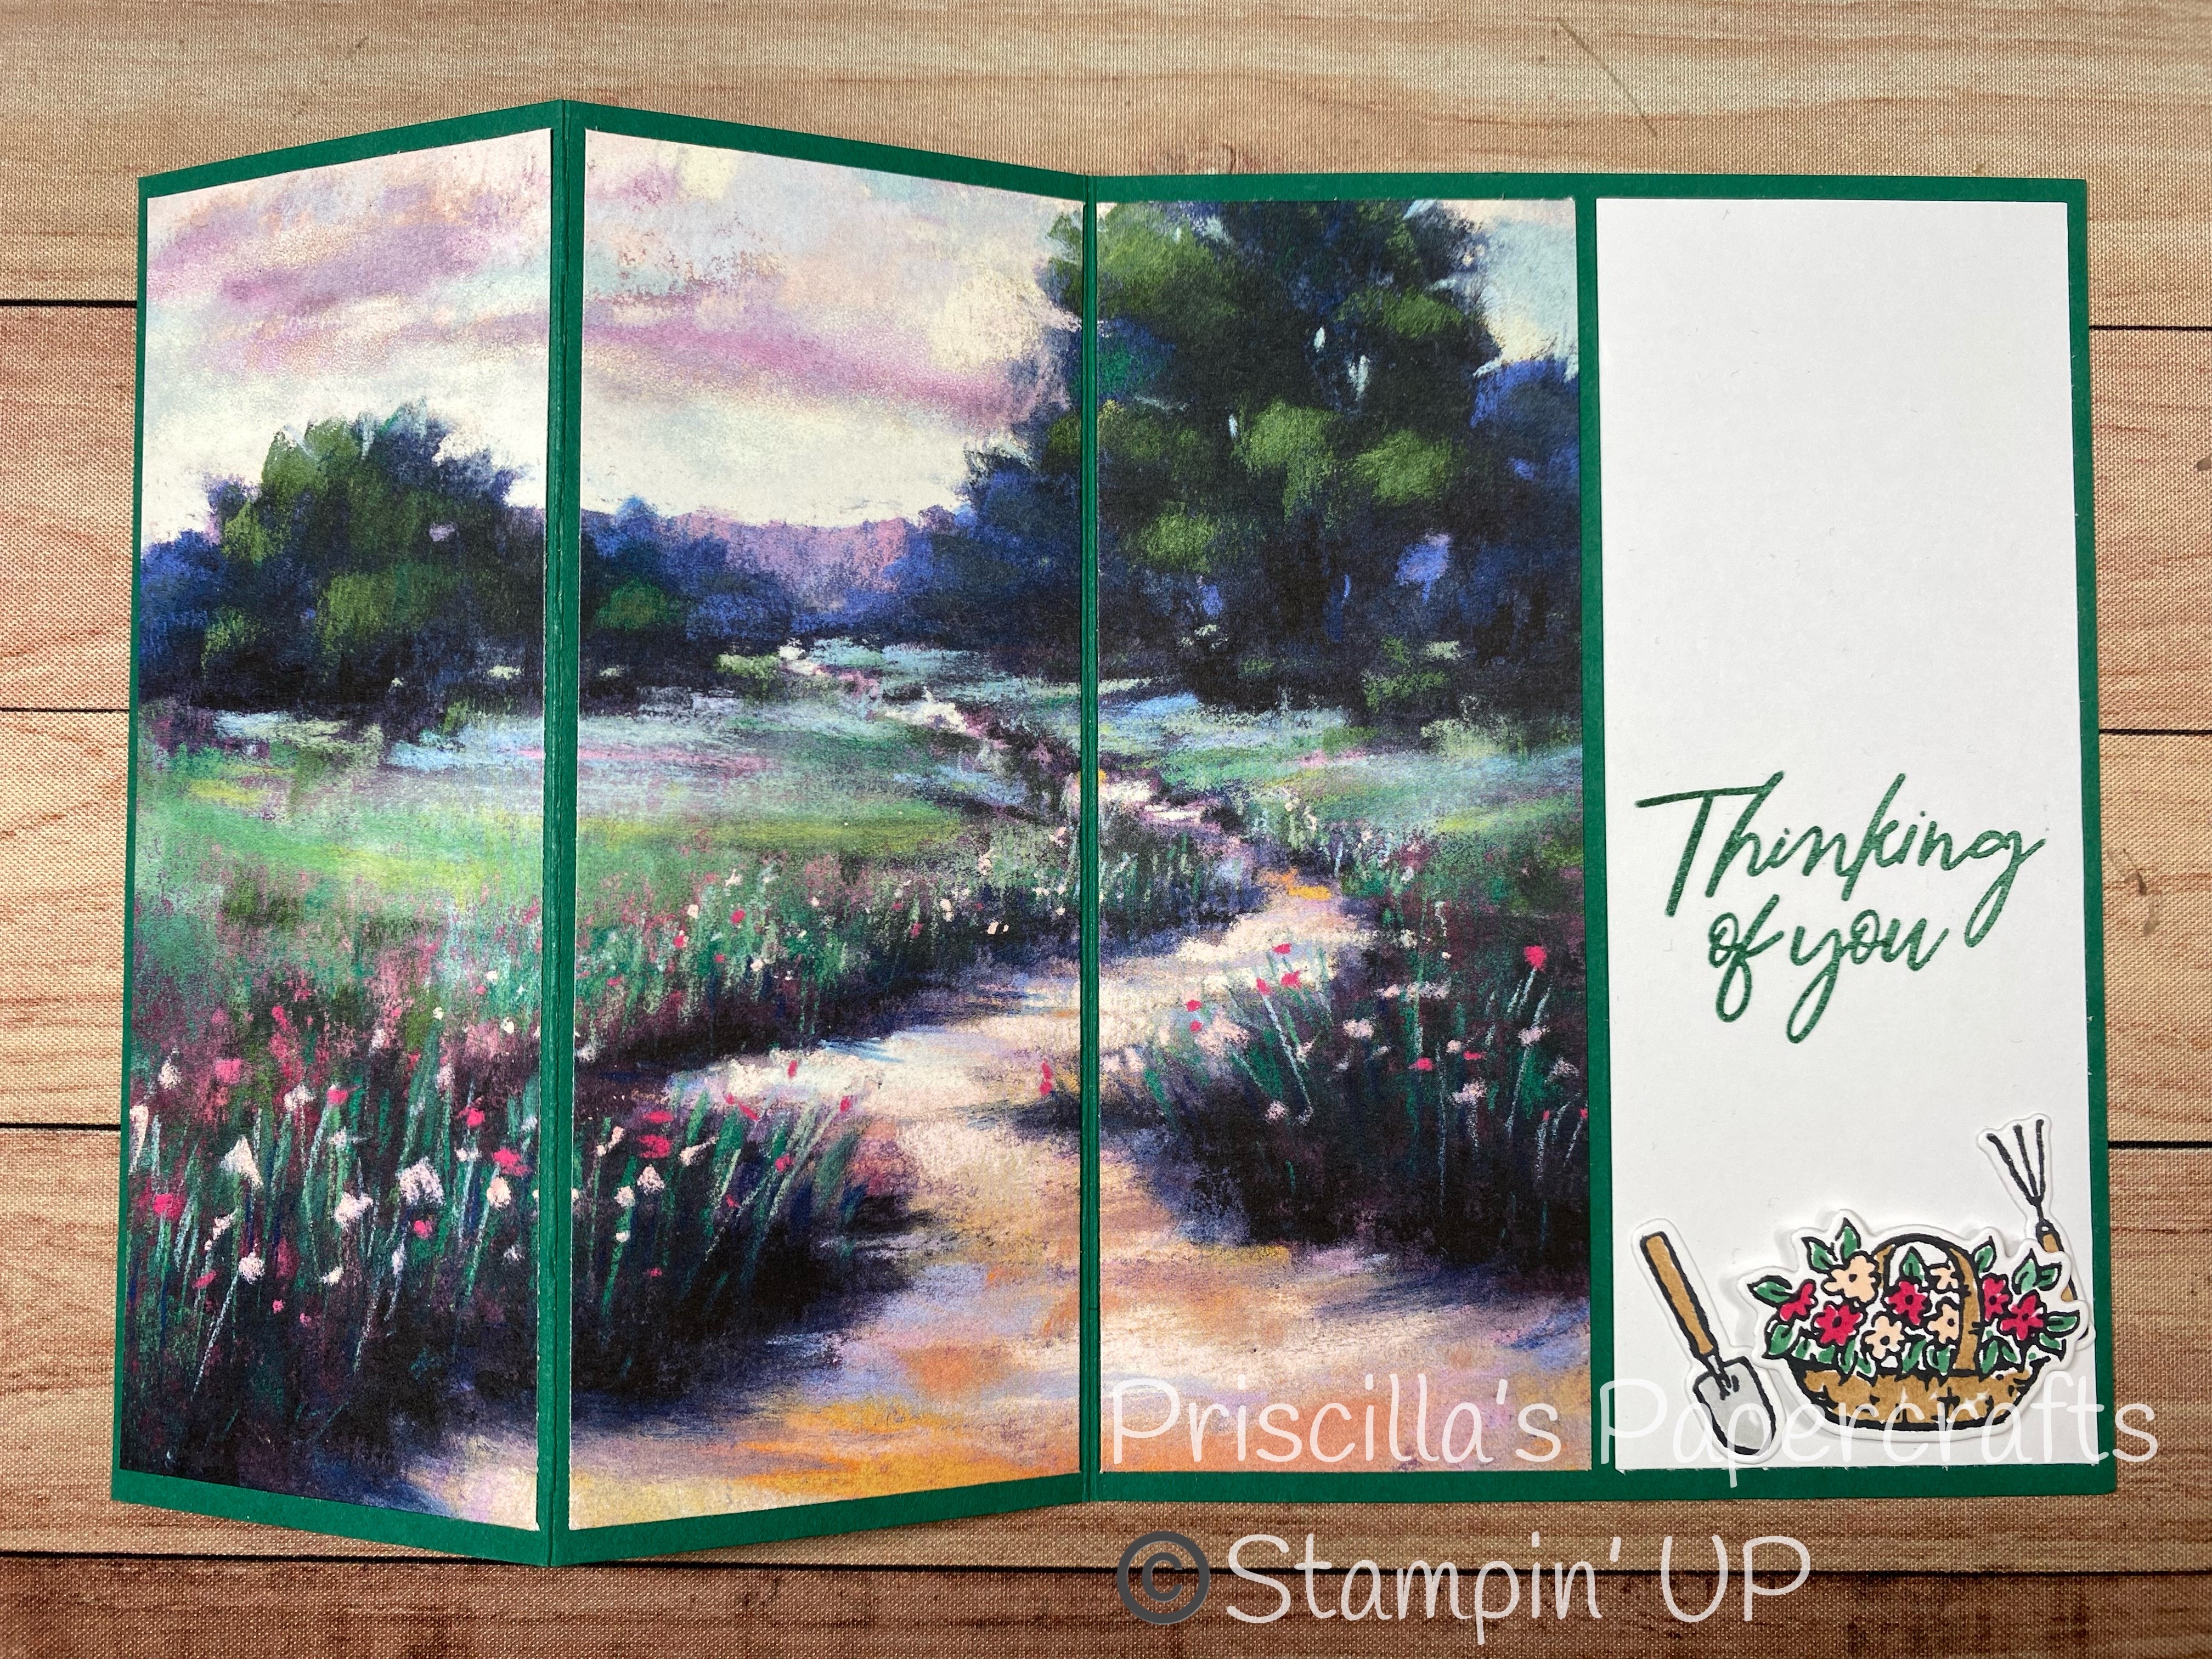
Aha! Here is the rest! Add your two other pieces of DSP to the panels as shown. This will allow you to see the whole scene! Beautiful!
The card will be folded in half, and then the front panel (the piece scored at 2-1/8") is folded BACK over the front, creating the first panel that you see.
Add a piece of Basic White (or a lighter piece of coordinating cardstock) cut to 2" x 5-1/4" to the last panel, as shown. Here is where you can write a greeting, add a die-cut, or stamp an image.
To write to your recipient, you can add a piece of 4" x 5-1/4" Basic White cardstock to the back of your card.
Check back later this week for an alternative card using the same dimensions.
And have fun creating a gorgeous scenic card!
")
")


 Designer Series Paper")


No comments:
Post a Comment