Showing posts with label Starburst Sayings. Show all posts

Thursday, January 15, 2015

Starburst Sayings for the Paper Craft Crew

Time to play with the Paper Craft Crew, who came up with this card sketch:

Paper Craft Crew Card Sketch 127 #stampinup #papercraftcrew #papercrafts #cardchallenge


And my card:
I started using the largest stamp from Starburst Sayings, stamping it on Whisper White card stock using Versamark ink.  This was heat embossed with Black Embossing Powder.  I then took my Daffodil Delight Blendabilities and created an ombre effect, coloring right over the embossed image:


I cut it out using the coordinating Starburst Framelits, then layered the image over two more starbursts of Daffodil Delight and Crushed Curry, both of which were embossed with the Perfect Polka Dots embossing folder.  These are popped up on the front of the card, using Dimensionals.

My card base is Whisper White, with a skinny edging of Daffodil Delight under a Basic Black layer.
Next comes a piece of Back to Black Designer Series Paper.

I took a little liberty with the sketch, as my focal piece was so large I couldn't get the banners to fit as they are in the sketch, so I placed them in the top corner.

I finished with Pearls Basic Jewels, colored in the three colors of Daffodil Delight Blendabilities, echoing the ombre effect of the main sentiment.

This card makes me happy!  Does it make you happy too?  Won't you leave me a comment and let me know?

All products used can be purchased here.

What have you created today?

Monday, June 9, 2014

Retirement (and I don't mean stamps!)

This time of year, the word "retirement" brings to mind stamps and accessories, as a new catalog is released and we say goodbye to those being "put out to pasture". 

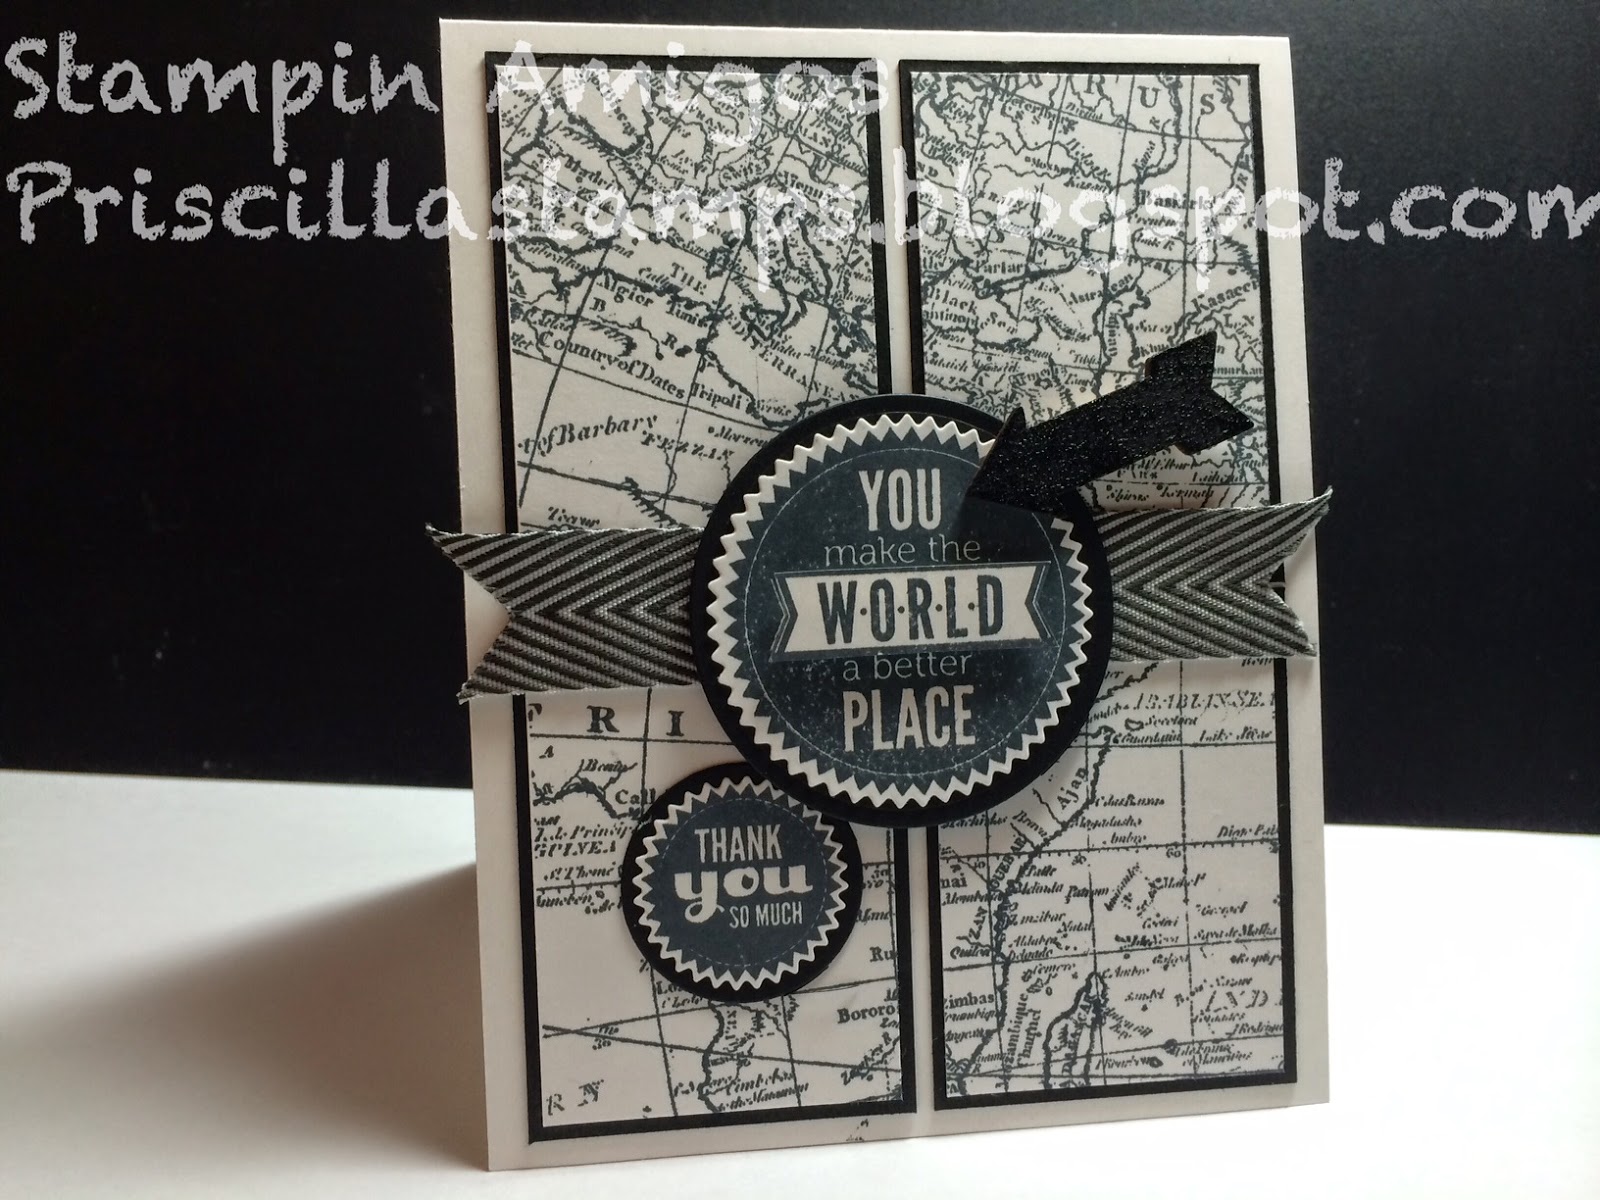
But today I'm focusing on an actual "retirement"--a doctor with whom I've worked for 15 years is retiring from his practice.  I needed a card to wish him well, and I found something on Stampin' Connection (a demonstrator only web site with thousands of samples), but now I can't find it and will not be able to give that person credit.  But the card was perfect!


 I began with a Whisper White base.  I stamped World Map in Staz On Black ink on Whisper White, and cut it into for panels.  Each was mounted on a slightly larger piece of Basic Black card stock, and they were carefully lined up and adhered to the card base. 

I stamped the sentiment from Starburst Sayings two times using Staz On ink, and snipped out the W-O-R-L-D from one of them.  Then I ran the other through the Big Shot, using the Starburst framelits, and added this to a circle of Basic Black.  And my little "W-O-R-L-D" banner was popped up with Dimensionals.

The little "thank you" was done the same way (Starburst famelits and circle punch).  Then, after adhering a strip of 3/4" black Chevron Ribbon, the sentiments were added.  I also took an arrow from Essentials Wooden Elements, pressed it onto a Versamark pad and sprinkled on black embossing powder.  After heat setting, this was added to the front with Mini Glue Dots. 

The inside had to be special too...so I "embossed" the outer edges by turning the card stock upside down and scoring with my Simply Scored board. 

The sentiment from Really Good Greetings and Teeny Tiny Wishes were lined up with my Stamp-a-ma-Jig for perfect placement and stamped in Staz On. 

I wish him well, and hope you enjoyed this card. 

All supplies can be purchased here.

Basic Black 3/4" Chevron Ribbo


Monday, April 14, 2014

Oh Where, Oh Where, Has Priscilla Gone?

Actually I haven't gone anywhere!  A trip to Hawaii or Europe might be nice, but not me...I've been crafting!  I have had two recent classes that put me in my craft room for hours at a time, and I couldn't be happier with the results.   I can almost say it was worth it!  Fortunately I did make a little time for my grandsons, and for planning a first birthday party for one of them, so I didn't give up on life entirely...I just had a lot of fun experimenting with my paper!

So enough about me...let's look at the results.  First up, a card for a special, private, class that I held yesterday.  This customer, and her mom, requested a "Card in a Box" for a graduating granddaughter.  And she is graduating from California State University, Sacramento (Sac State, to many of us) and that's where my daughter went.  So pulling out her diploma gave me my color combination:  green and gold.

And here's the results:


I was really quite pleased with myself--this card really shines in person.  Starting with the typical "card in a box" template, using Basic Black Card Stock, I added paper from the wonderful Modern Medley Designer Series Paper, layered on Very Vanilla Card Stock.   The box was put together with Sticky Strip (a MUST have for 3-D items!).  Then I inserted the z-folded "crossbars" so I could start adding my elements.
I searched my catalog of stamps, finding different phrases that I thought would work well for a graduate:  Hip Hip Hooray (from Hip Notes), Celebrate (from Starburst Sayings), Woo Hoo (from Just Sayin') and Way to Go (from the retired Starring You).   These were stamped in Garden Green, or embossed with Gold Embossing Powder, and then trimmed, flagged or layered on green or Gold (from the fabulous Gold Foil Sheets). 
Now making a graduation cap was challenging--I researched ways to do it, and ended up drawing a line, 2" long on a piece of Basic Black cardstock.  At the one inch mark (half way) I drew a perpendicular line that measured to 5/8" on the top and to 3/4" on the bottom.  Then I connected the corners, making an elongated diamond shape, and snipped it using my Paper Snips.  Then I used my 1/2" circle punch to cut two side-by-side half-circles; this was then punched using my 1" square--to make the bottom of the cap. 
I glued the two pieces together; then I needed to make a tassel.  I took the new Gold Bakers Twine and pulled the gold thread out.  Wrapping the now-plain, off-white colored twine around two fingers three times, I then carefully tied a thread around the top loops.  The bottom loops were snipped and voila--a tassel!  This was added to the cap with a gold brad...looks so cute!

Finding a retired piece of "Newsprint" Designer Series Paper allowed me to hand roll a diploma, which was tied using a little snippet of the Bakers Twine. 

I cut a few letters using an alphabet die and my Big Shot to congratulate the graduate; her name was added to the other side on my customer's card. 

We finished it all off with lots of stars--I still love my Merry Minis punch pack from an old holiday mini (but still available).  Some were punched from the Gold Foil Sheets, and others from some Garden Green cardstock run through the Big Shot with the Perfect Polka Dots embossing folder.  And they "float" by being added using skinny strips of Window Sheets (clear plastic sheets). 

The back of the card is easy to write on, and says it all--Congratulations from Zoo Babies and You Did It is one of the stamps in a photopolymer stamp set called Star Stamper.
Needless to say, my customer was delighted with her creation--and I bet her granddaughter will be too!

All supplies available here. 

Let's get creating!


Saturday, April 5, 2014

Fun Fold with a Belly Band

Yes!  I'm back!  I've spent a long week preparing for a BIG class over the past 2 days.  I held my first ever "Over the Top" class, showcasing three cards that I would NEVER attempt to make in a regular Card Club.  Lots of fun and a lotta work, but everyone enjoyed their "pushed to the limit" creativity.

I'll show you one of the cards we made later this week, but first, one more card from March birthdays:
This was a card we made last month (and I sent to my nephew).  It's a "Gatefold Card"--a fun and different card that still fits in a regular envelope.  A belly band holds it closed; slipped off you have:

To make this card, start with a piece of cardstock (I used Gumball Green) cut to 4" x 12".  Score along the long edge at 2", 4", 8", and 10".  Fold on the 4" line (as if you are closing a card) and then BACK on the 2" fold; repeat on the other side, folding on the 8" line (again, as if you are closing the card) and then back on the 10" mark.  This creates your "gate".
My front panels were decorated with Birthday Basics Designer Series Paper mounted on Summer Starfruit strips.  Inside, I stamped the sentiment from Perfect Pennants in Gumball Green, then stamped again on a scrap piece of Very Vanilla and punched out just the "a" with a 1/2" circle punch.  This was adhered over a little banner cut from Summer Starfruit and the Bitty Banners framelits. 

The card is kept closed with a belly band:

A strip of Gumball Green is placed under the card and brought up over the front.  By overlapping the front, the seam is hidden when the medallion is glued in place over the band.  The largest stamp from Starburst Sayings was stamped in Gumball Green and cut out using the Starburst Framelits, then mounted on a Summer Starfruit circle cut with the Circle Framelits. 

All items used can be purchased in my on-line store here.

Let's get creating!

Monday, March 31, 2014

A Purple Birthday

I think I have mentioned that March is a crazy month for birthdays in my family!  Six family members were born in March, so I spend a lot of time making birthday cards this month.  Here's another:
My granddaughter LOVES purple!  So I just had to make a purple card for her special day.  This one uses the starburst technique.  I started with an Elegant Eggplant card base, cut 5-1/2" x 8-1/2", and scored at 4-1/4".  To this I adhered a smaller layer of Wisteria Wonder. 

I cut 4 rectangles, 2 Wisteria Wonder and 2 of the Fancy Foil Designer Vellum in Silver; these were cut in half on the diagonal, and then the Wisteria Wonder pieces were run through my Big Shot with different embossing folders (Chevron, Sophisticated Stripes, Fancy Fan and Decorative Dots--a FREE Sale-A-Bration folder available only through Monday!), and they were all adhered to a piece of scrap paper in a fan design. 
A beautiful piece of Silver Foil cardstock was attached to the bottom, and a strip of (vintage) Elegant Eggplant grosgrain ribbon was tied in a knot around the card.
There's a little silver thread, pulled from the Silver Bakers Twine twisted through the ribbon--gives it a little sparkle.

Oh Happy Day, from Starburst Sayings, was embossed with Silver Embossing Powder on Whisper White cardstock; I sponged Elegant Eggplant ink over it all and then cut it out with the Starburst Framelits.  This was adhered to a circle in Eggplant and popped up on front.

What a happy card!

All items used can be purchased here.

And let's get creating!

Saturday, March 22, 2014

Oh Happy Day!

Yet another March birthday in the family, so yet another birthday card needed!  My what a busy month...

I finally broke down and bought the Starburst Sayings set, after having seen so many cute cards made with it.  This stamp seemed to shout "FUN", and looked to be the perfect sentiment for a wonderful niece.


I embossed the stamp with black embossing powder, after stamping it in Versamark ink on Whisper White card stock.  I then sponged Pool Party ink all over it, going off the edges.  The image was then cut, using the Starburst framelits, and layered on a circle of black cardstock, cut with my circle framelits. 

And speaking of "bursts", I used the beautiful FREE Sweet Sorbet Designer Series Paper (get some of your own for FREE with a $50 purchase during Sale-a-Bration!) to make this fun sunburst background.  I cut four rectangles of the DSP, cut each of them in half on the diagonal, and then layered them on a scrap piece of paper.  This was then layered on Basic Black cardstock, and I wrapped some Pool Party Ruffled Ribbon around it, tying a little bow.


The whole layer was adhered to a Pool Party base.

And not forgetting the inside:
Some Pool Party dots were stamped across the bottom using Border Banter, and the birthday sentiment from Bring on the Cake was added, using Staz On Ink.  The a coordinating piece of DSP was adhered to my envelope, tying it all together.

Happy Birthday, Abby!

Let's get creating!