Showing posts with label Everything Amazing. Show all posts

Wednesday, October 9, 2019

It's Another Birthday Card!

Time for another birthday, this time for my son, Matt.  He's currently stationed at Andrews Air Force Base in Maryland, so I don't get to see him and his family very often.  But I always remember the day he was born, and today, celebrate.


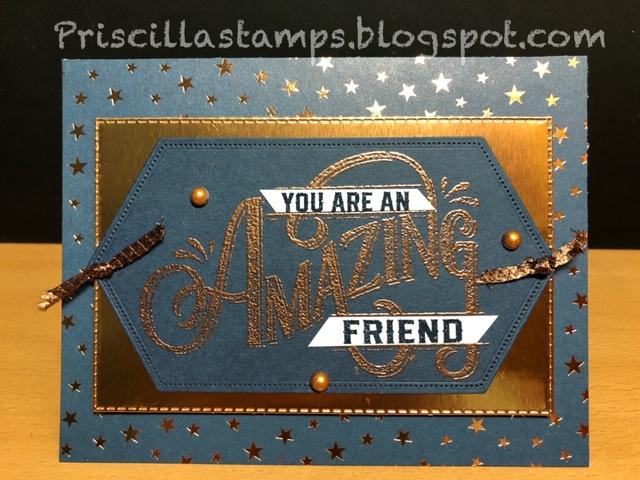
I love Night of Navy and Crumb Cake for a masculine card, don't you?

I turned to Everything Amazing for my images, and then remembered the Merry Christmas dies, which has this wonderful "Happy" die.  Isn't it perfect for a birthday?

A Night of Navy card base has a layer of Crumb Cake, and then I ran another piece through my embossing machine with the Corrugated embossing folder for a little texture.


After stamping my images in Night of Navy ink on Very Vanilla cardstock, they were cut with the Layering Squares dies and adhered to Navy squares cut with Stitched Shapes dies.

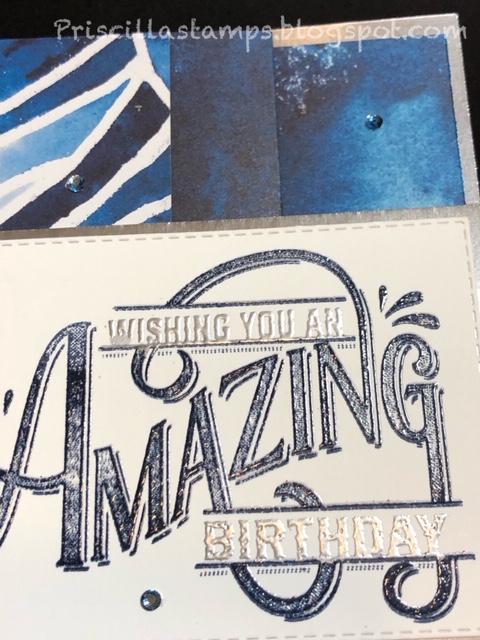
Then there's that "Happy":


I cut it out three times, twice in navy and once in Crumb Cake.  Then I stacked them all together, adhering them with Multipurpose Liquid Glue.  I love the depth and "shadow" effect you can achieve using this technique.

And those Merry Christmas dies has a great little die that was a perfect frame for my "birthday" stamp!  I love it when I can use my products for other than what they were intended.


Happy Birthday, Matt!


Product List


Friday, September 13, 2019

Everything Amazing

I got the pack of gorgeous Brightly Gleaming Specialty Designer Series Paper from the Holiday Catalog, and knew I would love it for Christmas cards.  But then I got to thinking about the versatility of Stampin' UP! products and decided to think outside the box.

How about this:


Not at all holiday-ish, this card uses Everything Amazing for that great focal image.  Because I wanted to use the designer paper with the copper stars, I stamped and embossed the main image with Copper Embossing Powder.

After cutting it with the Stitched Nested Labels, I mounted it on a piece of Copper Foil, cut with the Stitched Rectangles dies (and "adjusted" for width by re-cutting the foil with the same die moved up a little on the paper).


Copper Trim is knotted through little holes punched in each side, and I dipped some Pearls in the new  Delicate Pigment Ink in Celestial Copper.  (You need to sprinkle on Clear Embossing Powder and heat set the copper ink).  Although hard to see, the words stamped on Whisper White are stamped in Night of Navy ink and I used Clear Embossing Powder to  heat set them with a shiny coating.


Then the foil rectangle is added to the front of the card with Dimensionals.

So...a very un-holiday card using holiday paper.  What well you make with Brightly Gleaming?


Product List


Wednesday, August 14, 2019

Amazing Cards with DSP

If you're like me you have lots of Designer Series Paper that you feel guilty using, because you like both sides of the papers and can only use one on your card.

Well, feel guilty no more!  I have a great card for you that is easy to make, is a "WOW" card, and uses BOTH sides of the paper.  Take a look:


One of my very favorite new Designer Series Papers, See a Silhouette, and I get to use both sides!  LOVE!

I started with a piece of DSP that is 5-1/2" x 11-1/2".   It is scored at 4" 6-3/4" and 9-1/2", and then you have to decide which side of the paper will be the showcase on the inside of the card.  I decided to have the leaf design on the small flap on front and the beautiful "night sky" on the inside.

All you need for the card base is a piece of cardstock cut to 4-1/4" x 5-1/2"; here I used Pretty Peacock.


See that glossy stamping?  So easy to do with the Stamparatus!  Stamp once in your ink color of choice (I used Pretty Peacock).  Then clean the stamp and re-stamp it with Versamark ink.  Add Clear Embossing Powder and heat set--you can emboss in any of our ink colors!  Another LOVE!


When opened, the card is looonng....but this is when you can get the full effect of the DSP.  And you have several options for decorating.  I chose to use two panels.  The first is 1-1/2" x 5"; the other is 2-1/2" x 5".  You just want to be sure to adhere them all the way to the score line on the left, so the panel doesn't show when the card is closed.

Here's the back:


What a great way to showcase your DSP!

Want another sample?  I made this one using the same directions:


Same DSP, with a Silver Foil card base.

And again, using the Versamark over ink technique, I was able to get Night of Navy embossing:


and I embossed the rest with Silver embossing powder.


I also chose to add more panels to this inside; there are two of the smaller ones, and two of the larger. It covers up more of the DSP, but allows you to add many more stamps.


Pull out some of your DSP and try this...I know you'll love getting to see both sides of your pretty paper!


Product List