OK, are you ready to see an adorable gift card holder? I was playing with the Notes & Totes dies and came up with this card:

I had first made this:


So then I got to playing and figuring out how to make a coordinating card.
I started with a piece of Thick Basic White and added a piece of Brights 6" x 6" DSP in Daffodil Delight.
But it looked a little plain, so I stamped a few of the flowers from Delightful Wishes (the stamp set that coordinates with the Floral Delight paper) directly on the paper. I also added the greetings, from Tune In and Attention Shoppers.

And once I added the tote bag, I realized that I could pop it up so that it would hold a gift card - perfect for the "shopping is always a good idea" sentiment, right?
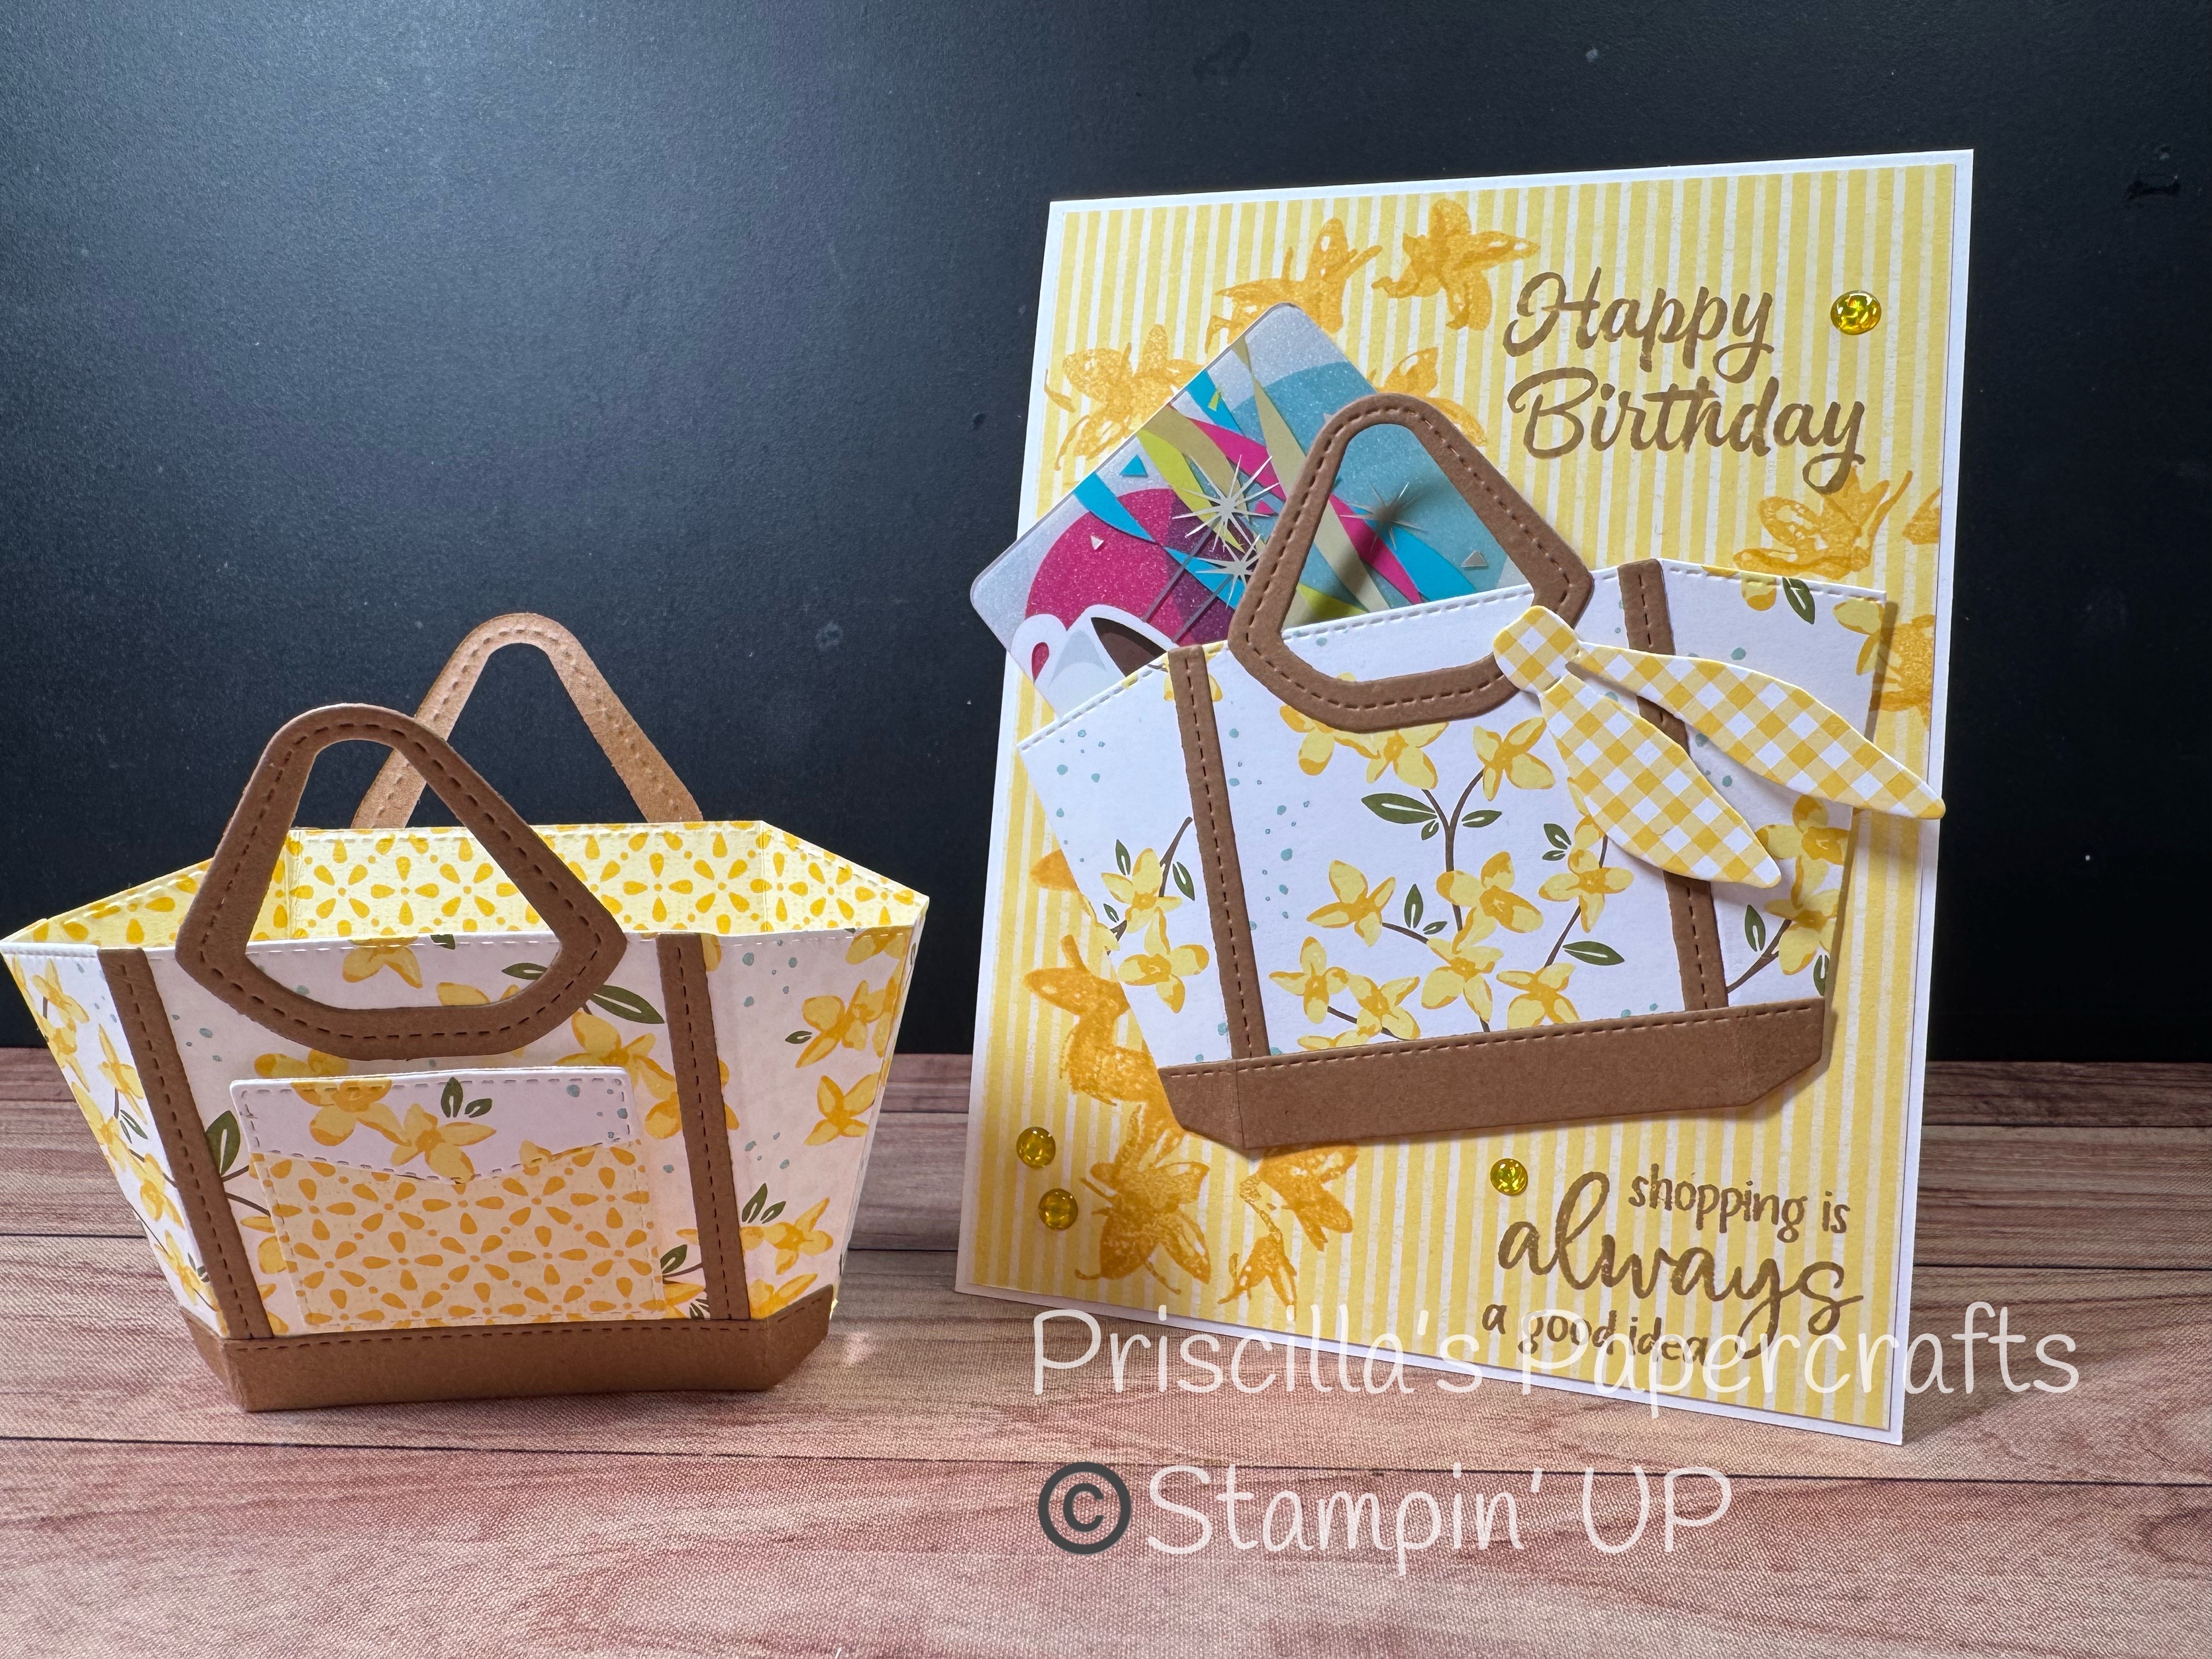
What an adorable combination!
Note & Totes will be released on May 6th when the 2025-26 Annual Catalog goes live.
But if you like this card, you may want to be sure to grab Tune In and Attention Shoppers (two of my favorite sets), as well as the Floral Delight DSP, as they are on the Last Chance List and will be retiring when they are all gone. And there's so much more! So don't miss out!
![Tune In Photopolymer Stamp Set (English) [ 163633 ]](https://assets1.tamsnetwork.com/images/EC042017NF/163633s.jpg "Tune In Photopolymer Stamp Set (English) [ 163633 ]")
![Attention Shoppers Photopolymer Stamp Set (English) [ 163640 ]](https://assets1.tamsnetwork.com/images/EC042017NF/163640s.jpg "Attention Shoppers Photopolymer Stamp Set (English) [ 163640 ]")
![Delightful Wishes Photopolymer Stamp Set (English) [ 164701 ]](https://assets1.tamsnetwork.com/images/EC042017NF/164701s.jpg "Delightful Wishes Photopolymer Stamp Set (English) [ 164701 ]")
![Pecan Pie Classic Stampin' Pad [ 161665 ]](https://assets1.tamsnetwork.com/images/EC042017NF/161665s.jpg "Pecan Pie Classic Stampin' Pad [ 161665 ]")
![Daffodil Delight Classic Stampin' Pad [ 147094 ]](https://assets1.tamsnetwork.com/images/EC042017NF/147094s.jpg "Daffodil Delight Classic Stampin' Pad [ 147094 ]")
![Crushed Curry Classic Stampin' Pad [ 147087 ]](https://assets1.tamsnetwork.com/images/EC042017NF/147087s.jpg "Crushed Curry Classic Stampin' Pad [ 147087 ]")
![Floral Delight 12" X 12" (30.5 X 30.5 Cm) Designer Series Paper [ 164700 ]](https://assets1.tamsnetwork.com/images/EC042017NF/164700s.jpg "Floral Delight 12\" X 12\" (30.5 X 30.5 Cm) Designer Series Paper [ 164700 ]")
![Pecan Pie 8 1/2" X 11" Cardstock [ 161717 ]](https://assets1.tamsnetwork.com/images/EC042017NF/161717s.jpg "Pecan Pie 8 1/2\" X 11\" Cardstock [ 161717 ]")
![Brights 6" X 6" (15.2 X 15.2 Cm) Designer Series Paper [ 163775 ]](https://assets1.tamsnetwork.com/images/EC042017NF/163775s.jpg "Brights 6\" X 6\" (15.2 X 15.2 Cm) Designer Series Paper [ 163775 ]")
![Basic White 8 1/2" X 11" Thick Cardstock [ 159229 ]](https://assets1.tamsnetwork.com/images/EC042017NF/159229s.jpg "Basic White 8 1/2\" X 11\" Thick Cardstock [ 159229 ]")
![Glossy Dots Assortment [ 158827 ]](https://assets1.tamsnetwork.com/images/EC042017NF/158827s.jpg "Glossy Dots Assortment [ 158827 ]")