Showing posts with label Timeless Arrangements. Show all posts

Tuesday, September 26, 2023

Got Scraps?

With just a few scraps of cardstock or patterned paper, you can make a really cute card!  

I saw this card by another demonstrator, and thought it would be a perfect way to use up some of my smaller pieces.


 Start by cutting some circles, squares or other shape using dies or punches.  Here I used Crushed Curry, Garden Green and a piece of the Fresh as a Daisy DSP with the Stylish Shapes dies.  

Two of the circles (cardstock ones) were added to a piece of Basic White cardstock with a strip of Lemon Lolly, then run through the Stampin' Cut & Emboss machine with a Basics Embossing Folder (for the polka dots).   The DSP circle was layered on top with Dimensionals.


All that was needed was a greeting (from Timeless Arrangements) cut with the Stylish Shapes dies. 


This makes such a pretty focal point, and not much else is needed to make a pretty card! 

All you need are a few scrap pieces of cardstock or DSP - something we all have, right? 😉


Product List

Thursday, July 20, 2023

Long Time, No Post

 My apologies!  It's been over a week since I posted last, but I've been prepping for classes and Cards-by-Mail, and, as I do it all myself, it's been tough to get anything else done.  Besides, I don't like to post my cards until the class attendees have seen them - that little element of surprise is always fun.

But the class is over and the Cards-by-Mail should be arriving today and tomorrow, so...


This little Z-fold card was one we made in my in-person class.  It uses a bit more than usual patterned paper, and I didn't have enough for everyone, so it was just for those who attended my class.  But isn't it pretty?

We used a Moody Mauve card base.  Moody Mauve is a dusty pink, one of the 2023-25 In Colors.  And the Designer Paper is the Fresh as a Daisy paper, which features Moody Mauve as one of the colors.  


When cutting cardstock for the base, you can actually get two cards from one sheet of 8-1/2" x 11" paper.  Holding the cardstock in landscape mode (the long edge at the top and bottom), measure up 3" from the bottom left-hand corner, and 3" DOWN from the top right-hand corner, making a small "tick mark" at each measurement.  Then insert your paper into your trimmer and cut from one "tick mark" to the other on the diagonal.  

Score your cardstock with the long straight edge (not the diagonal side) in your trimmer, scoring at 3" and 6-3/4".  This creates the "Z" fold.

You'll want three pieces of coordinating patterned paper - one piece measuring 4" x 5-1/4", one measuring 2-3/4" x 3-1/2", and a final one that measures 3-1/2" x 4-1/4".  The middle-sized piece should be a coordinating color or pattern, different from the smallest and largest pieces.  This piece goes on the BACK, center panel of the card.  

You will also need a Basic White or Very Vanilla piece that measures 3-1/2" x 4-1/4" for the middle panel, where you will write your message.


This card folds to fit in a standard Medium Envelope.  

Wouldn't you love to receive this pretty card?

Products used are listed below; click on the picture to go directly to my on-line store!


Product List

Friday, May 26, 2023

Triangle Flap Fold

I honestly have no idea what this fun-fold card is called, but I love it!  I'm calling it the Triangle Flap Fold, as there is a triangle and a flap.  Take a look:


 Can you see the flap?  How about the triangle?  

Maybe this will help:


The left side of the card is a triangle, made by simply slicing away half of the front of the card, cutting from the top where the score line is, diagonally down to the point of the card at the bottom.  

Then there's the flap:


This starts as a 3" x 8" piece of coordinating cardstock, scored in the middle and then adhered, so one part (the "back") is inside the card, and the other is on the front:


My color combo is Sweet Sorbet and Cherry Cobbler, along with the now-retired Gingham DSP in Sweet Sorbet.  

We made this card in class the other day, and I had it in a few color combinations.  We decorated our "flap" with a piece of Basic White, embossed with the Basics embossing folder (from the OnLine Exclusives collection).  Then we used the Timeless Arrangements dies to cut leaves and a label for stamping our greeting (also from the Timeless Arrangements stamps).  


Such a pretty fun-fold card!  Timeless Arrangements has a number of lovely sentiments, and a few different size labels.  And there are several types and sizes of leaves for your decorating pleasure.  It's a great set to have in your craft supply due to its simplicity and versatility - there are stamps for gratitude and positive thoughts, and who doesn't need that?  

Be sure to add Timeless Arrangements stamps and dies to your collection!  You'll be glad you did!


Product List

Monday, May 1, 2023

Sometimes Life Gets in the Way

Yes it does!  I had just come home from a lovely week-long vacation and was excited about crafting with some of my new pre-order goodies.  I made cards (see below) and then took a dinner break.  But before we could get dinner ready, I had a call from my daughter-in-law that my son was very ill and was headed to the hospital in an ambulance.  We needed to come watch the grandkids.  And off we ran.

The good news:  my son is OK.  He got home around 3:30 a.m.

The bad news:  I'm late for my post today.  Getting in at 4:00,  I decided I needed to sleep instead of doing a blog post 😴

But I wanted to show you some cards!  So:


 Being in a creative mood, I made three cards using the same (mostly) products:  the Timeless Arrangements stamps and dies, and Berry Burst, a new (returning) color, available tomorrow.

Let's look at them individually:


First I made a fairly quick and easy card, getting my mojo back after a week off!  I cut a piece of Berry Burst cardstock with two of the Radiating Stitches dies and added some greenery and a greeting inside the frame.


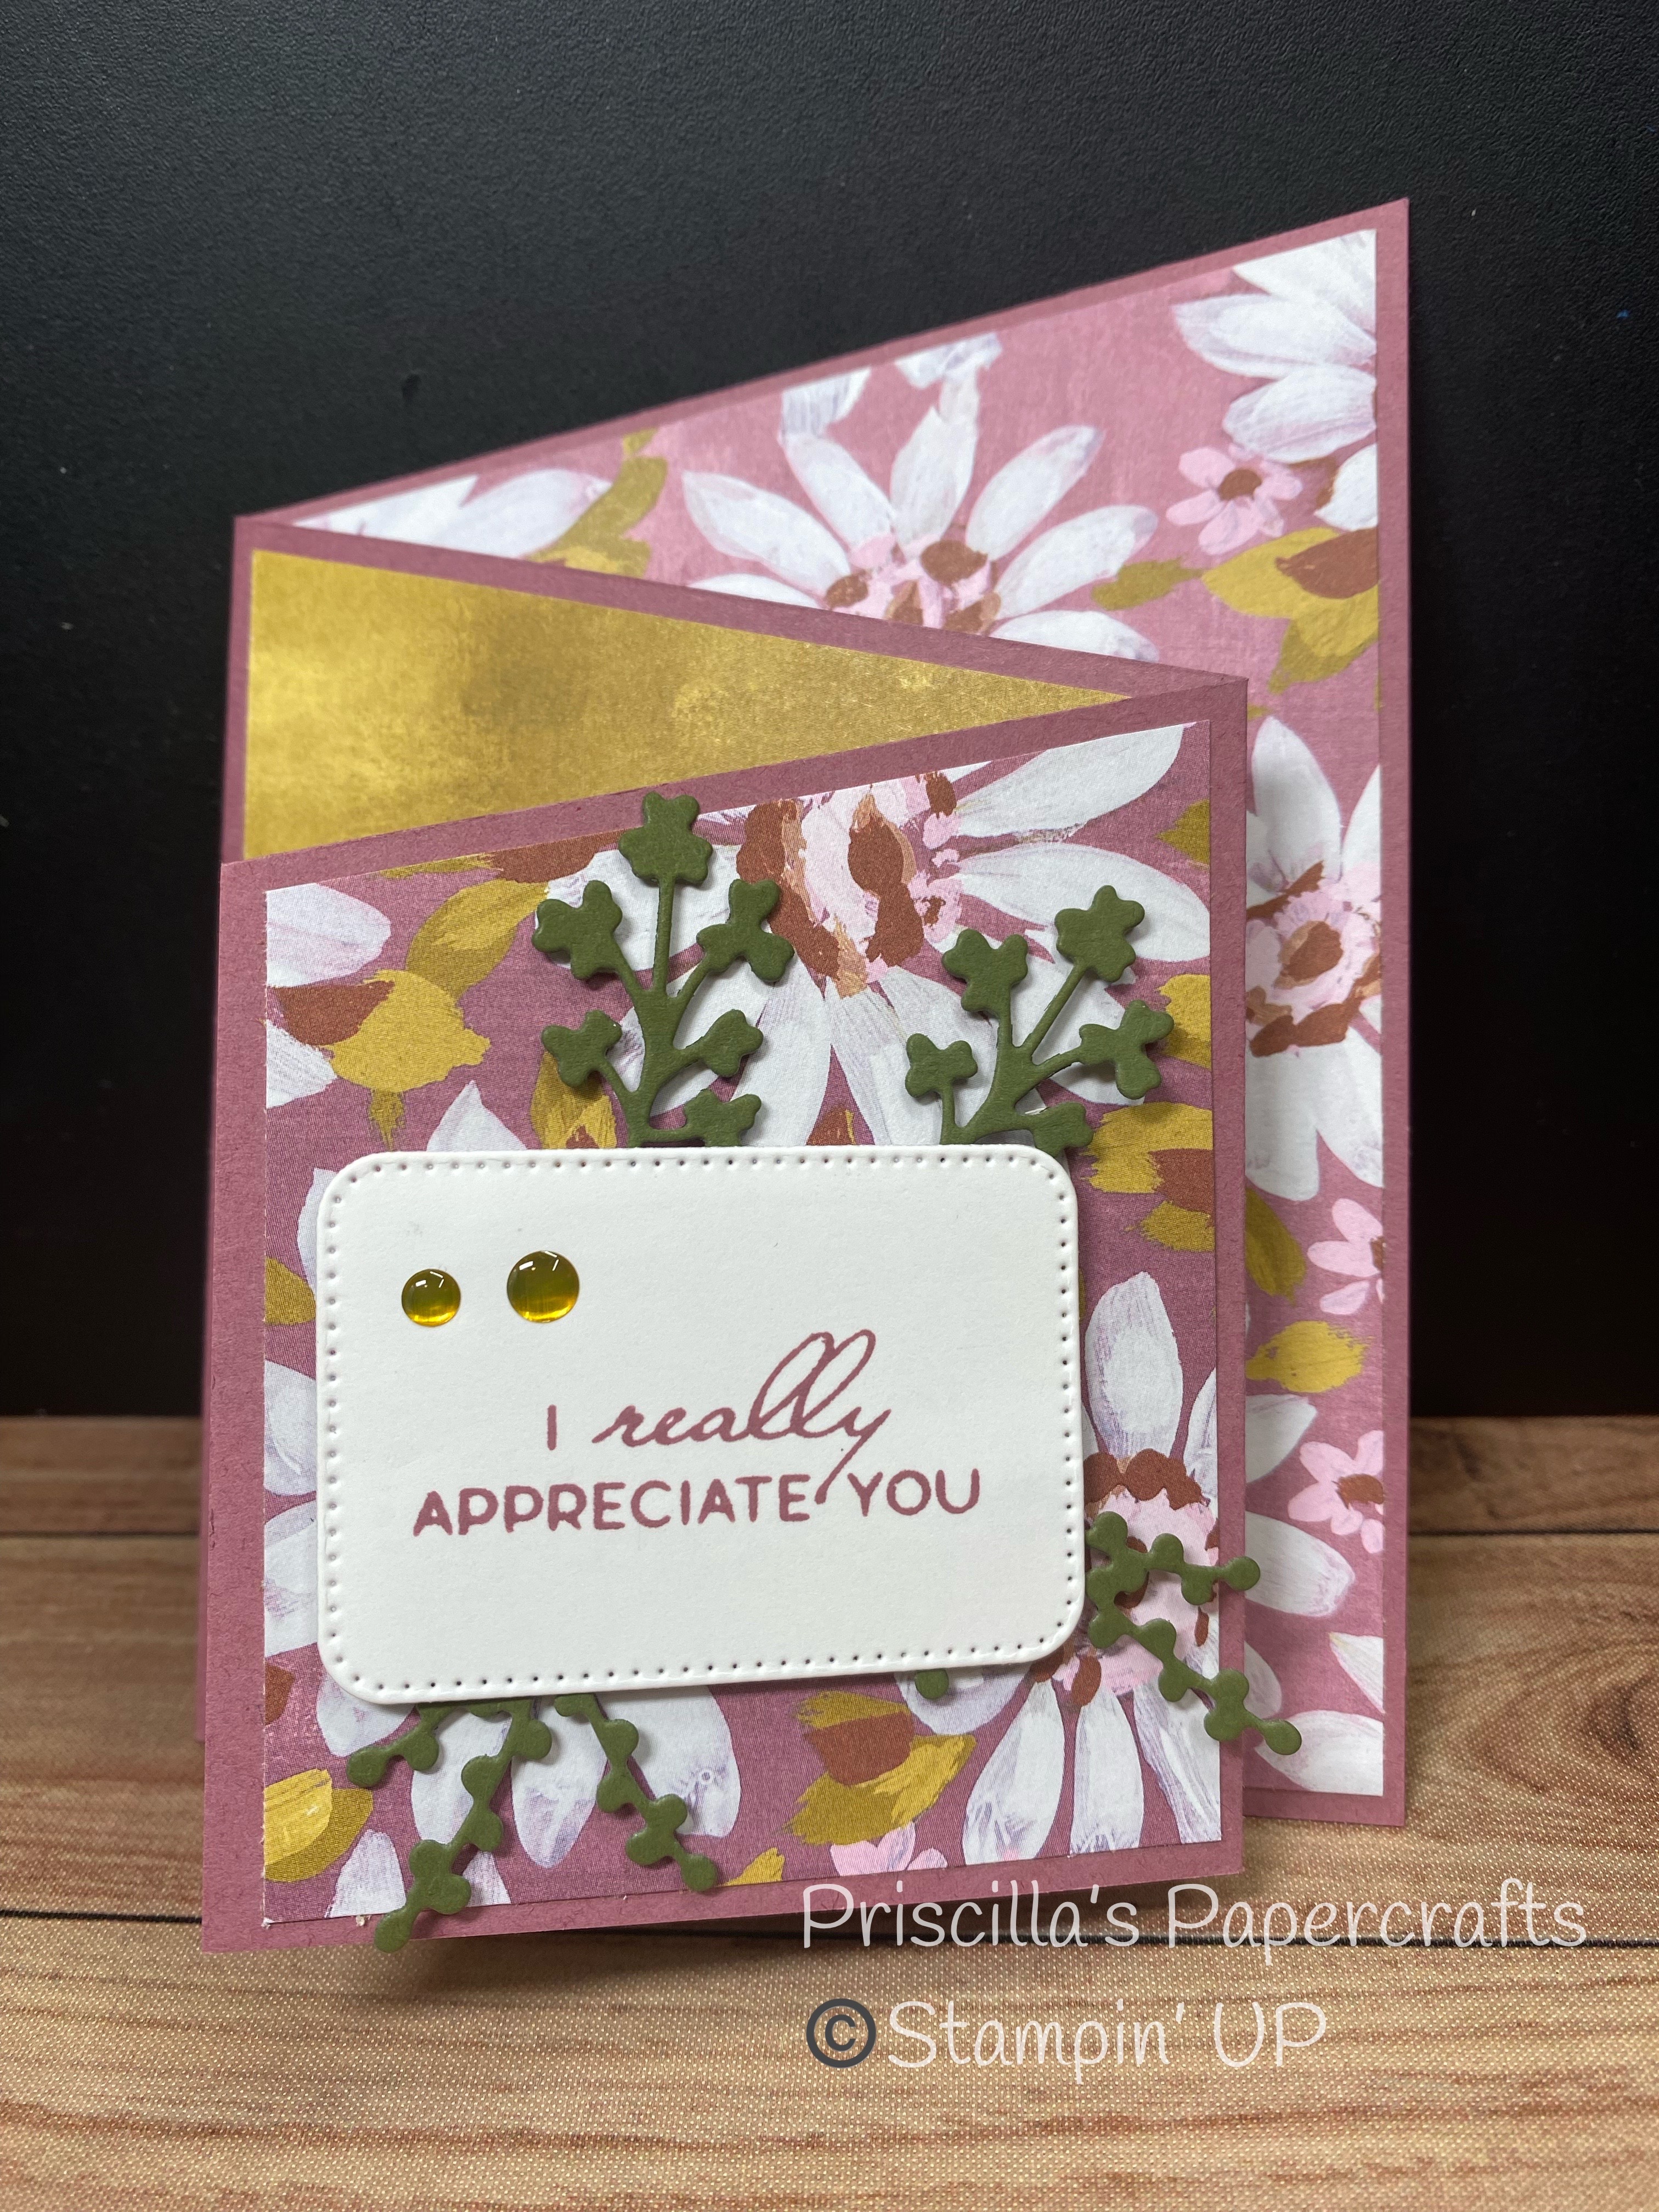
Then I had the Berry Burst rectangle that was left from the card above.  I adhered it to a piece of the new Bright & Beautiful patterned paper and cut a smaller piece of Basic White with another of the Radiating Stitches dies.  (This is a very versatile set of dies!  Available in the OnLine Exclusives).


I stamped a greeting in Berry Burst ink, and stamped and colored three sets of flowers, using Stampin' Blends.  And check out all that greenery!  Cut with a few of the dies in Granny Apple Green and Parakeet Party.  LOVE!


I tied up the flowers with a double bow of Linen Thread and added a few Glossy Dots, and then I got to thinking:


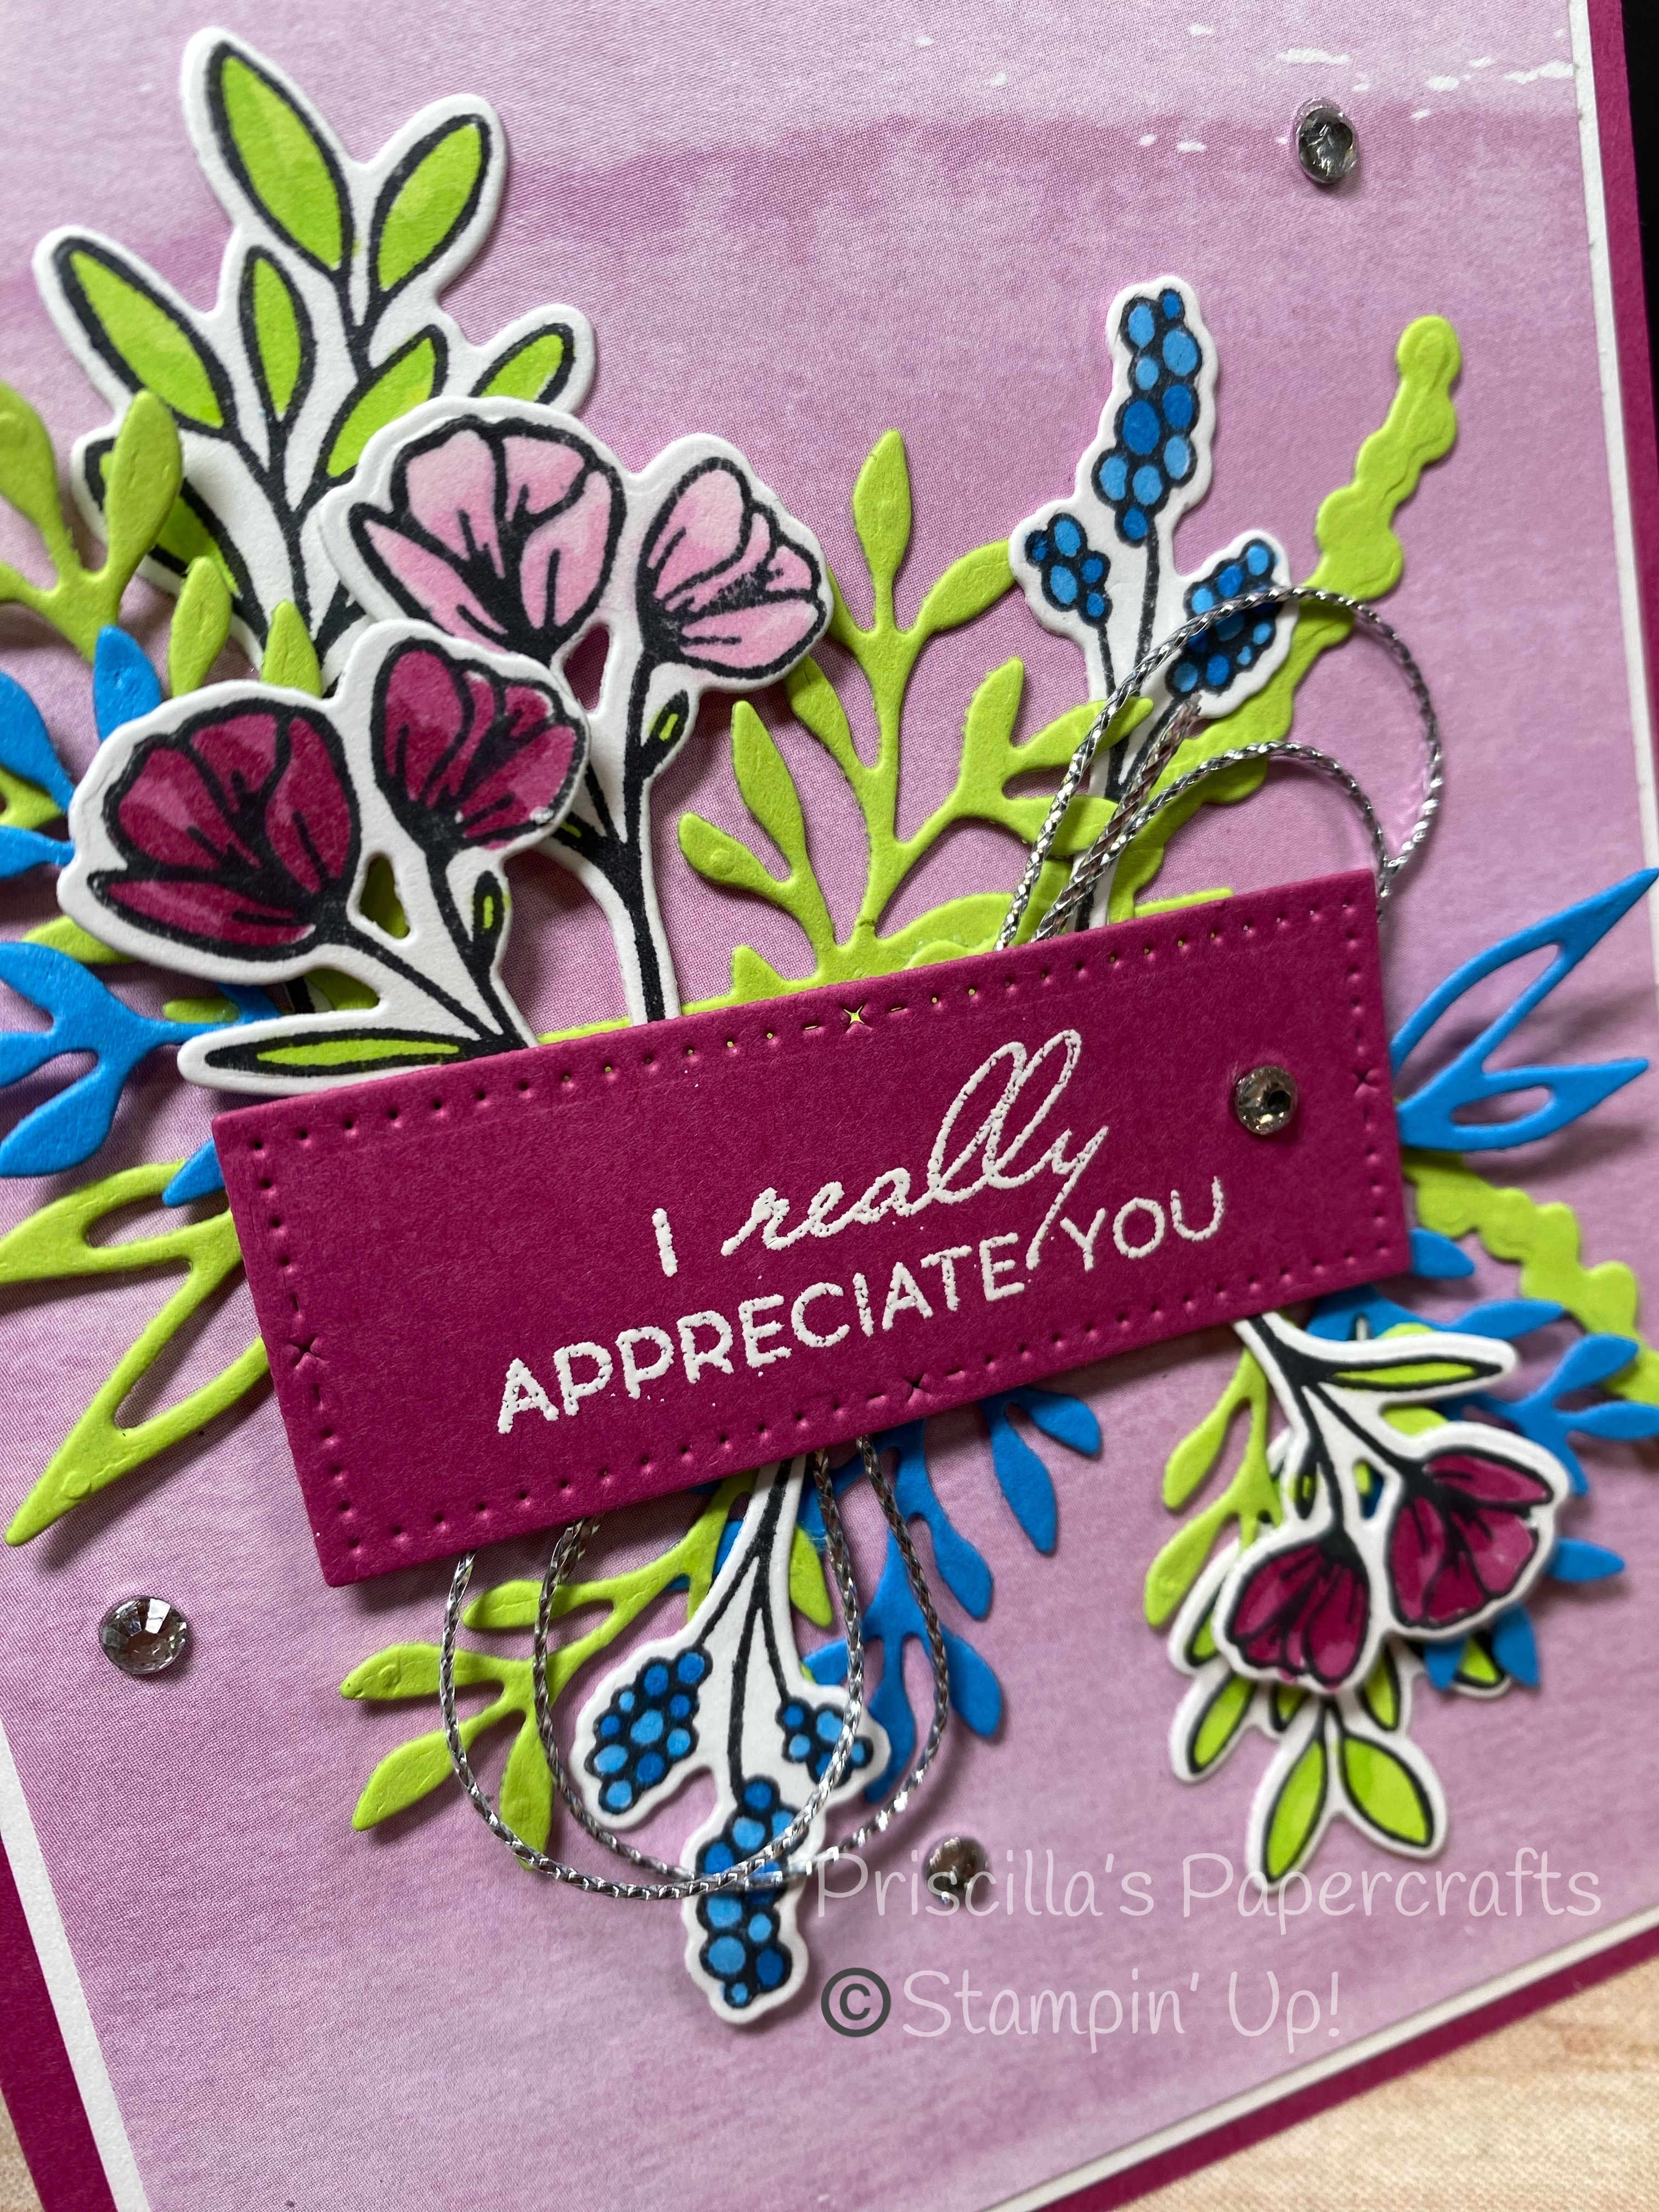
I loved the background paper for the second card, so I went back through my stack and found this piece, shades of ombre Berry Burst.  I got busy cutting lots of leafy pieces, and stamped and colored even more (thanks to Gail Ellis for the arrangement ideas).  The greeting is heat-embossed in white.  I also added a bunched-up piece of Simply Elegant Trim in silver.


My colors for this card were Berry Burst, Bubble Gum (💗), Azure Afternoon and Parakeet Party.   I love this bright pop of colors against the subtle background.


This card would be for a bit more "avid" crafter, but it really wasn't difficult.  I just had to play with all the elements to get the card balanced.  

And I finished with some Rhinestone Basic Jewels for a little sparkle.  


The new 2023-24 Annual Catalog will go live tomorrow!  Timeless Arrangements and Berry Burst will make their debut, and orders can be placed here.  I'm so excited!  Aren't you?  


Product List