Showing posts with label Delightful Daisy. Show all posts

Saturday, April 28, 2018

A Mother-In-Law Card

Today I'm going to show you a somewhat different card, one that I once was told is called a "mother-in-law card".  And I had to laugh--it's called that because there is very little room to write a note.

😂


When I was in Las Vegas for On Stage (convention), I receive a swap card with this layout.  Although the card was very different, it reminded me of - the "mother-in-law" card.  And here is why it's called that:


You only get a half-sized panel on which to stamp your sentiment and write a note.  

But let's take a look at this pretty card:

1.  The base is only a flat 5-1/2" x 4-1/4".  This is Tranquil Tide
2.  The embossed layer is 5-1/4" x 4", and I used the Layered Leaves embossing folder
3.  The Whisper White note card is only 3" x 8-1/2", scored and folded at 5-1/2".  

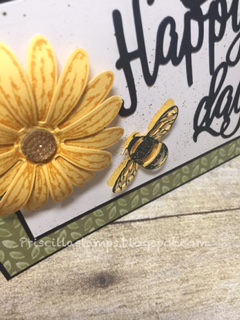
I layered the top of the note card with Delightful Daisy Designer Series Paper:


4.  The large scallop is cut with the Layering Circles Framelits dies and Whisper White cardstock
5.  The Tranquil Tide circle is also cut with the Layering Circles
6.  The daisy from Daisy Delight was stamped twice using Tranquil Tide ink, then punched with the Daisy Punch and layered together
7.  The finishing touch is the Clear Faceted Gem in the center of the daisy

Now at my Card Club we used the same design, but made it a Mother's Day card:

So pretty!

This one uses soon-to-be retired Wisteria Wonder cardstock and more of the Delightful Daisy DSP.  And we embossed the background with the Basket Weave embossing folder, but the basic card is the same as the Tranquil Tide one above.  

Try your hand at the "mother-in-law" card--there may not be much room to write a message, but I'm sure your mother-in-law will love it anyway!  

Product List


Friday, September 22, 2017

A Daisy Collar

Remember my Collar cards?

Well one of my blog readers asked for directions, which I happily sent her, and while I was checking out my our instructions, I made this card, just to be sure I had the dimensions right:

I wrapped the card front in Delightful Daisy Designer Series Paper, and then created a cute focal point in the center.

My flower was made using the Daisy Punch, and I stamped the leaves from Daisy Delight on Old Olive cardstock and fussy-cut them out using my Paper Snips.  There's a beautiful Gold Faceted Gem in the center, catching the light and looking very sparkly!

The daisy is mounted on a Whisper White circle, cut with the Stitched Shapes framelits, which is atop two layers--Night of Navy and Daffodil Delight, both cut using the Layering Circles framelits.

The sentiment is from Eastern Beauty, and is stamped in Night of Navy.


Try wrapping your card in DSP--it makes such a statement!  And maybe it keeps your card warm too!  😁


Product List

Saturday, July 29, 2017

Happy "B" Day

Quick card:

This came together in minutes (I woke up thinking about this card!).

Make it:
1.  Cut Basic Black cardstock to 5-1/2" x 8-1/2"; score in half to create your card base
2.  Cut designer series paper from Delightful Daisy to 5-3/8" x 4-1/8" and adhere to the base
3.  Cut Whisper White cardstock to 2-3/4" x 3-3/4" and flick Old Olive ink splatters on it using Stampin' Write Marker in Old Olive; adhere to a piece of Basic Black, cut to 2-7/8" x 3-7/8"; mount to card front


4.  Stamp Daisy from Daisy Delight, using Daffodil Delight ink on Daffodil Delight paper; repeat and punch each, using the Daisy punch.  Curl petals using Bone Folder.  Layer one on top of the other, adhere. Add Gold Faceted Gem to center; adhere to card using Dimensionals
5.  Stamp bee from Dragonfly Dreams in Tuxedo Black ink on Daffodil Delight paper; cut with Detailed Dragonfly Thinlits; adhere to card using Dimensionals
6.  Cut Happy Birthday using Happy Birthday Thinlits; snip off "birth" and adhere to card

Sit back and enjoy your creation!


Don't forget!  Bonus Days are here for a few more days.
For every $50 order placed in July, you'll earn a $5.00 coupon that can be used on your orders in August.  No limit!

Details:
  • There's NO limit to how many coupons you can earn.  All orders qualify with the exception of Starter Kits
  • An e-mail address is required--Bonus Days Coupon codes are emailed to you when your purchase totals $50 (before tax and shipping costs).  Be sure to save this email so you can use it in August; coupon codes cannot be re-mailed, so don't lose it!
  • Coupon codes will expire August 31st!  Be sure to use them before month end
Product List