Wednesday, December 26, 2018

Sale-A-Bration is Coming!

Every January, Stampin' UP! starts the year with a gift for you.  That's right - Stampin' UP! has FREE goodies that you can earn with qualifying orders through the Sale-A-Bration event.  Sale-A-Bration only lasts for a short time, so you don't want to miss it.

Today I'm showing you one of the items you'll be able to earn, the Precious Parcel Card Kit.  Take a look:


What a fun way to send happy mail!

Would you like to see what else will be featured in the 2019 Sale-A-Bration?  Contact me for your FREE catalog; I'm sure you'll be as excited as I am to see this year's offerings.

Saturday, December 22, 2018

Ink Masters Team Treat Swaps

Our Ink Masters team had a meeting last week, and it was such fun!  Nine of us were able to attend; we had a holiday pot-luck dinner and discussed some Stampin' UP! business, and then it was time to exchange our "Treat Swaps".

Everyone brought a package that can hold a little treat.  And we had such fun looking at our creations.  I thought I would share some today.


Look at the adorable pineapple that Tani made!  She had one for each guest, and explained that they can be opened by pulling the top along the linen thread, revealing the goody inside.  Then they can be closed up again, so we'll be able to re-use/re-gift them.  So clever!


Bonnie brought this perfect little box, holding two Ferrero Rocher candies.  Yum!  And so pretty!


Crystal's bag opens with a squeeze--a great fun-fold with a treat inside!  And her tag is so sweet!


I love Geanie's little lip gloss holders--each one had different papers and tags, using the Cookie Cutter Christmas set.


Tani also made these cute Elf Treats--so clever to wrap a candy bar with card stock and make it look like an elf (or Santa, if done in red) suit.

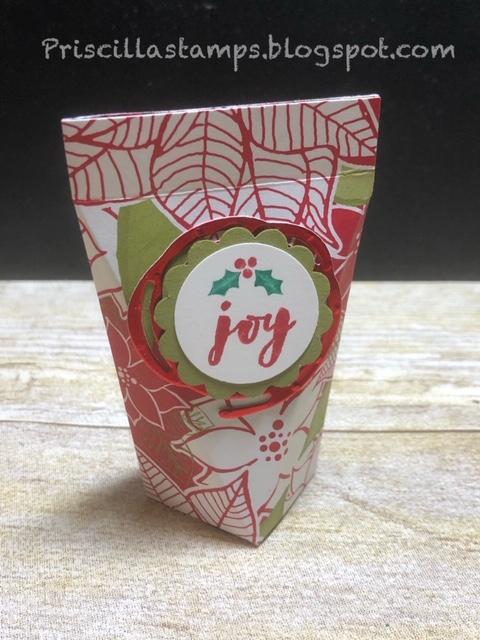
And I made "poppers":


These cute little treat holders come together quickly with the Envelope Punch Board.

Any of these little "giftables" would make perfect stocking stuffers.  You still have a few days...why not make some and watch the smiles appear on Christmas morning?

If you don't have a Stampin' UP! demonstrator, I'd love to help you.  Contact me for a catalog today!


Thursday, December 20, 2018

Got Gift Cards?

Giving gift cards is an easy way to get someone just what they want (cuz they get to pick it out themselves 😉) but it can feel rather impersonal to just stick it in an envelope.  So here are some examples of dressing up your gift cards:


I just love these Pizza Boxes!  So much fun to play with!

I started with the Pizza Box, stuffed in some Ready Shreddie (it's on the Clearance Rack NOW) and added the gift card.  Then the fun began.

First came a belly band.  This one uses a piece of Festive Farmhouse Designer Series Paper.  Then come the decorations.


I made a wreath using the Foliage Frame Framelits - I cut out 10 each of Mossy Meadow and Old Olive leaves, and layered them over a circle frame (I cut two sizes of Layering Circle Framelits, nestled together to create a frame).  The "merry" is a retired thinlet set, cut with Gold Glimmer Paper.  And the bow is Real Red Mixed Satin Ribbon.  I just added some Red Rhinestones to finish it off.


and using my retired Little Letters dies, I added names.  No tags needed!

Here are a few more samples:


These use Signs of Santa and Santa's Signpost Thinlits for the kids.


And one more:


That fabulous "Merry" is from the Merry Christmas Thinlits dies, cut in Black Glimmer Paper .

How do you give gift cards?  I'd love to see your ideas.

Products used are listed below; click on a photo and go straight to my online store.


Product List


Tuesday, December 18, 2018

Beautiful Birthday

I've been so busy!  The past few weeks have been overwhelming with holiday preparations, classes and birthdays!  Yes, I said birthdays.  It just isn't right that people are born at this time of year...😂.  There is far too much to do, and then I have to make a birthday card!?!

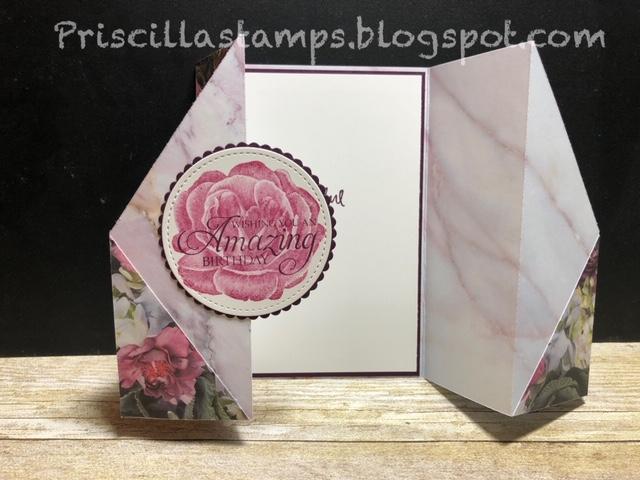
But I found a beauty!  Tammy Beard, a Stampin' UP! demonstrator who has a blog that I occasionally visit, had a lovely template for a differently-folded card, and I decided to try it.  Take a look:


This unique fold really lets the gorgeous paper shine!

I had some Petal Promenade Designer Series Paper that I hadn't really used.  So THIS was the time!

Starting with a 5-1/2" x 12" piece, I scored it at 2", 4", 8" and 10".  The paper was folded on the 4", across the front, then back on the 2"; this was repeated on the other side, folding across the front on the 8" score line, and then back on the 10".


What gives the card the beautiful diamond pattern is trimming the corners off the top on each side (measure down to 2-3/4" along the edge and trim from that point to the score line (either the 2" or the 10").  Then flip the paper over and adhere the corner trimmings to the bottom (see the rose pattern on the bottom corners in the photo above?).


The rest is simple:  I used the lovely rose from Healing Hugs, stamped with Berry Burst ink (stamped off once so it is lighter) on Whisper White card stock.  This is stamped over with full-strength Fresh Fig, using a sentiment from the upcoming Humming Along (snack peek -- to be released on January 3rd).  It's cut with the Stitched Shapes Framelits, and layered on a piece of Fresh Fig card stock trimmed with the Layering Circles Framelits.

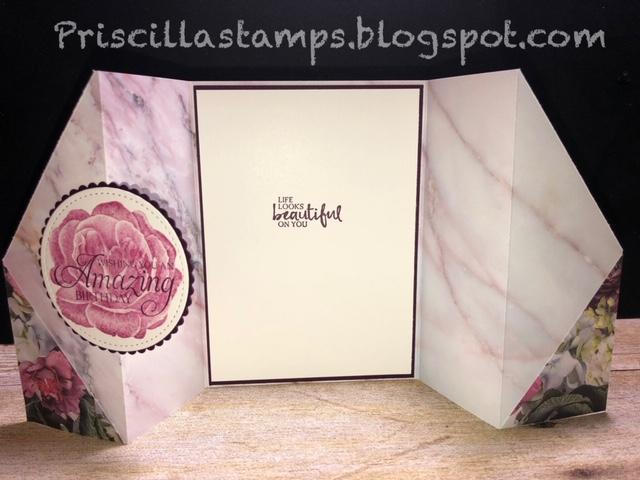
And inside?


Fresh Fig and Whisper White, stamped with a phrase from Beautiful You in Fresh Fig.

Such a pretty card!


Are you a paper-hoarder, like me?  This is a perfect way to use that beautiful paper and let the designs from both sides show.  The only question is, which side will be the outside?

Products used are listed below; click on a photo and go straight to my online store.

And don't forget to check out the Clearance Rack - new items were added today!

Product List

Tuesday, December 4, 2018

It's Here!

It's here!  The bag we've been waiting for will be available for purchase starting tomorrow, 12/5; take a look:


The Stamparatus is Stampin' UP!'s stamp positioning tool, and is a hot ticket item right now. Those of us who have tried it love it!  And when stamping multiples of any image, it can't be beat.  Not to mention lining up two-step stamps...makes stamping accurate every time!


And now we have a perfect bag in which to store your Stamparatus!  Not only can you store your Stamparatus tool in the bag, but there's room for accessories.  Extra plates?  No problem.  Specially sized Grid Paper?  Plenty of room?  Spare magnets?  Sure enough!  It all fits and looks great when you are on the go!

Get yours tomorrow!

Here's how to order:

Craft & Carry Stamparatus Bag (only) - Item Number 149695      $29.00
Stamparatus Bag and Stamparatus Tool - Item Number 151961    $78.00

Monday, December 3, 2018

Pretty Treats

I've been asked to create some inexpensive treats for the employees in my sister's office.  She gets them a gift card, but likes to have a pretty little "sumthin" to go with it.  Here's one idea I presented:


These are the ClearTiny Treat Boxes from Stampin' UP! and they make a really cute favor or table decoration.  These each hold 6 Ghirardelli Chocolate squares but the recipient will have to open the box to see what's inside.


I used Designer Series Paper (Festive Farmhouse), cutting a "just under" 2" strip x 8-1/2" long.  It was scored at "just under" 2", "just under" 4", "just under" 6", and "just under" 8", leaving the 1/2" strip on the end.  After folding on the score lines,  I just placed it inside the box along all 4 sides - a perfect fit!

Each box has a banner, cut with the Takeout Treats dies, and stamped with Itty Bitty Greetings.  This one has a Shaded Spruce tag and some holly from Peaceful Poinsettia.  But check out the top:


Such a pretty little wreath!  The Sprig Punch did all the work, cutting Shaded Spruce, Call Me Clover and the Tranquil Tide glimmer paper from the Joyous Noel pack.  All it needed was a bow of the Mixed Satin Real Red Ribbon, and some sparkly Red Rhinestones.


Who wouldn't love to get a little package like this delivered to them?

And what about this one?


Here is the gorgeous flower from the Detailed Poinsettia Framelits Dies.  I cut a Cherry Cobbler base and a Merry Merlot Glimmer Paper (also from the Joyous Noel Glimmer Paper pack) using the Framelits, and layered them together.  


The leaves are the Nature's Roots dies with the Tranquil Tide Glimmer Paper, and I colored some Rhinestone Basic Jewels with Shaded Spruce Blends (and there's a Red Rhinestone in the middle).


This one got the royal treatment with a sparkly tag and sprigs, along with the banner.

Wouldn't you just love to see one of these little beauties sitting on your desk?  Yummy boxes, and yummy treats!

Make them yourself; here are the supplies used:

Product List