Monday, January 23, 2017

Designer Tee

Yesterday I showed you the adorable Tasty Trucks, one of the FREE offerings from Stampin' UP!'s Sale-a-Bration brochure, and today I'll introduce you to Designer Tee, another FREE stamp set.  This cute collection has lots of versatile phrases that you can use, either paired with the Custom Tee set/bundle, or on it's own.  Take a look:


Sale-a-Bration is nearly half over, so don't delay.  Get your FREE Designer Tee today!

Sunday, January 22, 2017

A Taco Truck on Every Corner?

Now who wouldn't love a taco truck on every corner?  If you haven't had a lunch or dinner from a taco truck, you are definitely missing out!  And when Stampin' UP! brought out this adorable set in the Sale-A-Bration brochure, I knew I had to make room for this one at my house!


Tasty Trucks is one of the FREE offerings from Sale-a-Bration this year.  It is the cutest little truck, with LOTS of extras to make it special:  tacos, pancakes, cupcakes, ice creams cones, sausages and hot dogs!  So you can turn your truck into the perfect treat for any occasion.

I chose the taco truck, and opted to use the Festive Birthday Designer Series Paper to go along with it.  I knew my nephew would get a kick out of this card.

The card base is Tempting Turquoise.  I adhered a strip of the DSP to one side, and stamped the little taco stamp randomly on the rest, using Tempting Turquoise ink.


My truck was stamped on Shimmery White cardstock and then colored with the Watercolor Pencils and Blender Pens.  (I apologize for the lighting--I realized while in a hotel this week that I hadn't photographed this card, and I was giving it to my nephew, so had to take the pics in the hotel.)

And catch this sentiment:

That made me laugh out loud!

Tasty Trucks is FREE with a qualifying purchase.  Don't miss out!


Product List


Thursday, January 19, 2017

Back to the Watercooler


Yes the Wacky Watercooler gang returns for "part II" of our introduction to the Occasions and Sale-a-Bration catalogs.  We have 13 "hoppers" and I hope you'll be sure to visit each site to see what our artists have created.

Our hop is a circle; if you have joined here, welcome!  And please be sure to click the links below to see all the sites.  If you've just come from my friend Penny's blog I know you've been blown away by her skills--I frequently CASE her cards, and today is no exception.

Our goal is to show you some of our favorite new products from these new catalogs, and I will start with a stamp set that surprised me.  I first saw it at the On Stage "convention" in November and decided I didn't "need" it...and then it grew on me.  So here is my rendition of Beautiful You:

This set is a TOTALLY MUST HAVE stamp set!  The gorgeous, stylized drawings of women, added to the fabulously wonderful sentiments AND fantastic fonts make this a go-to set for those special female friends in your life for just about any occasion.

I decided to make a simple, elegant set of cards, all in black and white.  I actually created this first one for my daughter...and the rest is history.

My daughter is very stylish (and skinny) and this just looked like her.  I had a little gift for her, and wanted to include a card, and this was born.  Whisper White Thick cardstock (5" x 10" and scored at 5") is the base for all three cards in the set, along with a 4-7/8" x 4-7/8" Basic Black square.  Then I took a variety of black and white Designer Series papers (from the Neutrals Paper Stack and Pop of Pink) and created my background.

The stamps are all inked with Memento Tuxedo Black ink on Whisper White.

And each card has a different, subtle embellishment--Metallic Enamel Shapes on the first card, Basic Black Solid Bakers Twine on the second, and black Sharpie-colored Pearls on the last one.

I thought this would make a lovely gift, so I created a special gift box:

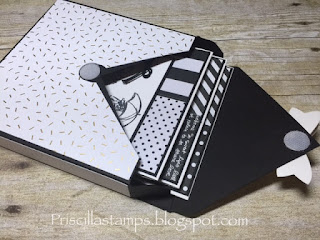
Using a 10" x 10" square of Basic Black and the Envelope Punch Board, this box came together easily.  I covered it with the specialty paper from Pop of Pink (it has gold flecks), and added a Gold Foil bow (from the Bow Builder Punch).


The box is perfect for holding the three cards and envelopes.

So there's project #1 - what do you think?

And Project #2?  Easy peasy:

I LOVE the simplicity of this card.  I needed a special card for a former colleague who just began a new job, and I wanted to use the new Celebrations Duo Textured Impressions Embossing Folders.  I also wanted to try the Falling in Love Designer Series Paper, and BAM!  It all came together!

First, that embossing folder.  It actually DE-bosses; the word is sunk into the paper, not raised up.  I ran it through the Big Shot with the embossing folder and then took the circles (2 sizes) from the Happy Celebrations stamp set.  Using Tip Top Taupe (stamped off), Soft Sky and Blushing Bride (stamped off) I stamped right over the letters.  But since they are de-bossed, the letters stay white.  Cool, huh?

The ribbon edging the panel is a FREE item from the Sale-a-Bration brochure.  The 3/8" Metallic Ribbon Combo Pack comes with two rolls of ribbon; the white one is woven with shiny silver accents, and the vanilla ribbon has shiny gold accents--really pretty!

The card base is Soft Sky.  There is a skinny panel of Tip Top Taupe and then a layer of the Falling in Love DSP--a beautiful bokeh look (which I copied onto my de-bossed panel).  And the "New Beginnings" is from the Happy Celebrations set too.  I really loved the way this came out!

So there you have it--my two projects using new items that I wasn't in love with at first, but REALLY grew on me!  Sometimes you just have to try something new!

Now it's time to go visit a favorite virtual friend of mine (who I actually once met in person!), Jean Fitch.  Jean is extremely creative and dares to try new things.   Let's go see what she has to show us today.  Thanks for stopping by!

https://jlfstudio.wordpress.com


http://wackywatercoolerstamping.blogspot.com
http://pennytokensstampinspot.blogspot.ca


Wednesday, January 18, 2017

Look What Just Arrived! (January Paper Pumpkin)

Oh, my, another adorbs treat holder from Paper Pumpkin, just in time for Valentines Day...Take a look:


Wanna get in on the fun?  Subscribe now and get your own bright orange box, delivered right to your door each month.  And what could make it better?  Purchase a 3-month subscription at the discounted rate of $55 and you also get to choose one FREE item from Sale-a-Bration!  And who doesn't love FREE?

Click here to join...and skip to the fun!

Friday, January 13, 2017

They're Baaack...(Well Almost!)

Yes, the Stitched Shapes Framelits are coming back and will be available to purchase on Monday, January 16th.  That's just 3 more days!  Yippee!

See what all the excitement's about:


Want some of your own?  Click here to order on Monday...and start creating beautiful, detailed projects easy as pie!

Tuesday, January 10, 2017

Birthday Blast (redux)

I had every intention of using today's card for my blog hop last week.  I had created it for a birthday in December and held off posting it, waiting for the hop.  Then I started making a box to go with the card, but things took a turn, and once the box was completed, I didn't think the card matched it.  Back to the drawing board.  But I was excited to end up with this (which was featured in the blog hop over the past few days):

So on to the first card I made using Birthday Blast, a new set featured in the Occasions Catalog.  You'll note a similar color theme, but a much different card:

This card took on a life of it's own.  Does that ever happen to you?  I started with an idea - the star die cut - and this card just grew!

The Star Blast dies are edgelits, meaning that you can make the bottom part as long/short as you want.  Once the stars were cut, I ran the bottom through the Big Shot with the Festive Embossing Folder.  I liked the size, so the card became a 5" x 5" square.

And then there's that frame...I'm in love with the Tasty Treats Designer Series Paper.  I wanted to use the Watermelon Wonder-striped piece on this card, and kept trying to layer it.  When none of the ideas worked, I simply cut a square hole in the center of the paper and used it as a frame - voila!

That allowed me to add the squiggles in the corners (this is one of the included dies in the Star Blast Edgelits set), and I also cut more stars using Pool Party and Silver Glimmer Paper.

What a fun way to celebrate!

All supplies used can be purchased in my online store by clicking on the photo below:


Product List

Sunday, January 8, 2017

Inside the Lines

One of the 2017 Sale-A-Bration offerings is a wonderful designer series paper called Inside the Lines.  These 12" x 12"-sized sheets are black and white for coloring (or not) when using for your creations.  I was first introduced to the fabulous paper at the Stampin' UP! On Stage convention in November, and couldn't wait to order it.

Here's my first card:


This is one of the 4 designs contained in the package, and probably the easiest to color.

I used the new Watercolor Pencils from the Occasions Catalog, along with Blender Pens.  So pretty!


I chose the Melon Mambo and Rich Razzleberry pencils for my flowers, and then colored the dragonfly with Bermuda Bay and Pacific Point.  Once blended the colors soften and shade nicely.


You might notice a little sparkle; that's Clear Wink of Stella splashed on the flowers and dragonfly.

A $50 purchase is all you need to qualify for a pack of Inside the Lines, which you then get for FREE!  And who doesn't love FREE?

All supplies used available by clicking on the picture:


Product List