Showing posts with label Timeless Tulips. Show all posts

Monday, May 18, 2020

Time for Sympathy

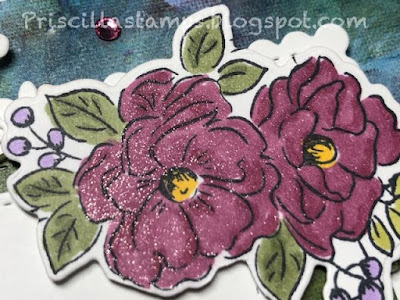
Sometimes you need a sympathy card.  I recently had one of those times, sadly, and sat down to create something lovely to send to the family.


It can be hard to fine the right words to say, but in this case, I think the sentiment was just right (Timeless Tulips).

The Perennial Essence Designer Series Paper made a serene background, with another piece layered under the greeting.


These beautiful flowers from the Happy Birthday Sale-a-Bration set, with the coordinating Birthday dies added a feminine touch and were colored with Stampin' Blends to highlight the colors of the DSP.


The Stitched So Sweetly dies (the scalloped rectangle and the label for the sentiment) work well together with the Stitched Rectangles dies (the Mossy Meadow layer).  And the Birthday dies have some lovely leaves and sprigs for filling in the spaces.


Hard to make, but I think it ended up being a perfect way to remember a special person.


Product List


Monday, March 23, 2020

Watercolored Tulips

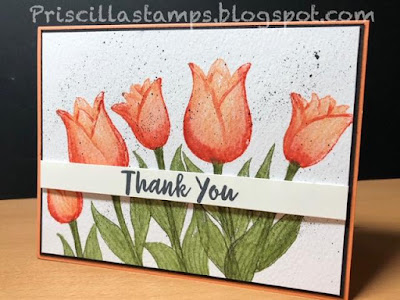
I saw a video on Peggy Noe's blog about watercoloring the tulips from Timeless Tulips, and had to give it a go.

These tulips are SO pretty when watercolored.  Look:


This is an example of stamping only - no punches, dies or layers.  But look at that texture!


The tulips were first stamped in Grapefruit Grove ink on Watercolor paper.  Then, with an Aqua Painter, I pulled the ink over the stamped image, blending it.  Then I took a re-inker and dropped a few drops on my acrylic block, and using the Aqua Painter again, shaded the bottom of the tulips and gave some definition to the petals (painting, lightly, over the "lines" of the flowers).


The stems were stamped in Old Olive, and "painted" with the Aqua Painter, and the leaves were added last, getting the same "paint brush" technique.


I finished with some splotches of black, using the Basic Black Stampin' Write Marker, and flicking the brush side with the inside of the cap.

Try using your Aqua Painters to add dimension to your flowers--it's easy and so pretty!


Product List


Thursday, February 20, 2020

A Pot of Tulips

Remember flowerpot cards?  They were all the rage MANY years ago, when I was a relatively new stamper.

But with the release of the Tulip punch, Timeless Tulips and the new Pleased as Punch designer series papers, I decided to pull out this oldie-but-goodie and see what I could do.  And I like it!


Isn't that cute?

So first, the flowerpot:


My old (very old) template was much smaller.  The size of the tulip flowers cut with the new punch would have WAY overshadowed that pot.  So I had to come up with something new.

This is a 4-1/4" x 11" piece of Terracotta Tile cardstock, scored at 4-1/4"  and 9".  I used the scallop from the Seasonal Layers dies for the edge and ran the rest of it through the Stone embossing folder. I folded on the 4-1/4" score line and folded on the 9" line to make the front.  Then I measured from 3/4" from each end (on the bottom fold) and trimmed to the edge to make the shape of the pot.  Finished it off with some Petal Pink Organdy Stripe ribbon.

 For the insert (Terracotta Tile, 3" x 6-1/4" and Whisper White, 2-7/8" x 6-1/8") I first stamped part of the stems from the Timeless Tulips using Granny Apple Green ink.  Then I added a few leaves.

The tulips were simply punched from the Pleased As Punch DSP using the Tulip punch, then either glued directly to the insert or popped up with Dimensionals.


The insert fits into the flowerpot:

 and is ready for mailing.

Except...it's too large for a standard envelope.  Lucky for me I have an Envelope Punch Board (were you lucky enough to get one off the Clearance Rack?), so I just used the same tulip DSP and created a custom envelope for my card:


With it now being tulip season here in Oregon, I know I'll be creating many more flowerpot cards!  Try it!


Product List