Showing posts with label Color & Contour. Show all posts

Monday, January 30, 2023

Celebrating Sale-a-Bration

How about a week of ideas using products from the Sale-a-Bration brochure?  You ARE aware that Sale-a-Bration is going on now, right?  And that for every $50 order made, you get to choose a FREE item from the brochure?  

Well let's take a look at some of the products that you could choose with your qualifying order.  I'll have samples all week using many of those products.

Starting with...drumroll...Dainty Flowers 12" x 12" Designer Series Paper!  This beautiful paper is pretty enough to stand on its own for a card front.  But it coordinates with the Dainty Delight Bundle in the January - April 2023 Mini Catalog.  The bundle (stamps and dies) is $54.75 - enough to earn you the FREE Dainty Flowers paper!  

For my project today, I only used the FREE paper, along with some cardstock and stamp supplies.  The Dainty Designs paper is the star of the show:


For this set of notecards, I only used ONE sheet of the Dainty Designs paper.  Just ONE!  This particular piece has floral designs on the top and bottom edges of the paper - cut the paper in half at 6", then trim each half in 4"  x 5-1/4" pieces and voila!  SIX cards!  Let's take a closer look:


Mounted on Mossy Meadow cardstock and stamped with Framed Florets in Mossy Meadow ink.


Another Framed Florets greeting, this time in Rich Razzleberry, and mounted to Blushing Bride cardstock.


This greeting, from Color & Contour, was stamped in Rich Razzleberry, which is also the card base color.


One more Framed Florets greeting, again in Rich Razzleberry on a Rich Razzleberry card base.


Not only is the paper from Sale-a-Bration, this card features a greeting from Beautifully Happy - a FREE stamp set during SAB with a $100 purchase!  I used Mossy Meadow ink and cardstock.


Go To Greetings provides the sentiment, in Rich Razzleberry on Blushing Bride cardstock.

And then:


Each card has a matching envelope.  I simply added a strip of the designer paper to the envelope flap and trimmed around the edges.  It's a beautiful way to coordinate and finish off your card/envelope!

But I couldn't stop:


I created a box using Rich Razzleberry for the box bottom and the DSP for the to lid, tied it up with a Natural Finish Ribbon bow, and added a sweet tag:


Cut from the matching DSP, I used the Celebrate with Tags dies and Go To Greetings to create the tag.  And inside:


This is going to be a birthday present for a neighbor.  A simple, yet beautiful box of notecards and matching envelopes.  

Who wouldn't love to get this?  

Don't miss out on Dainty Flowers DSP - available only while supplies last, and this item will sell out quickly!  Click here to see SAB options.


Product List

Wednesday, July 27, 2022

For a Bridal Shower

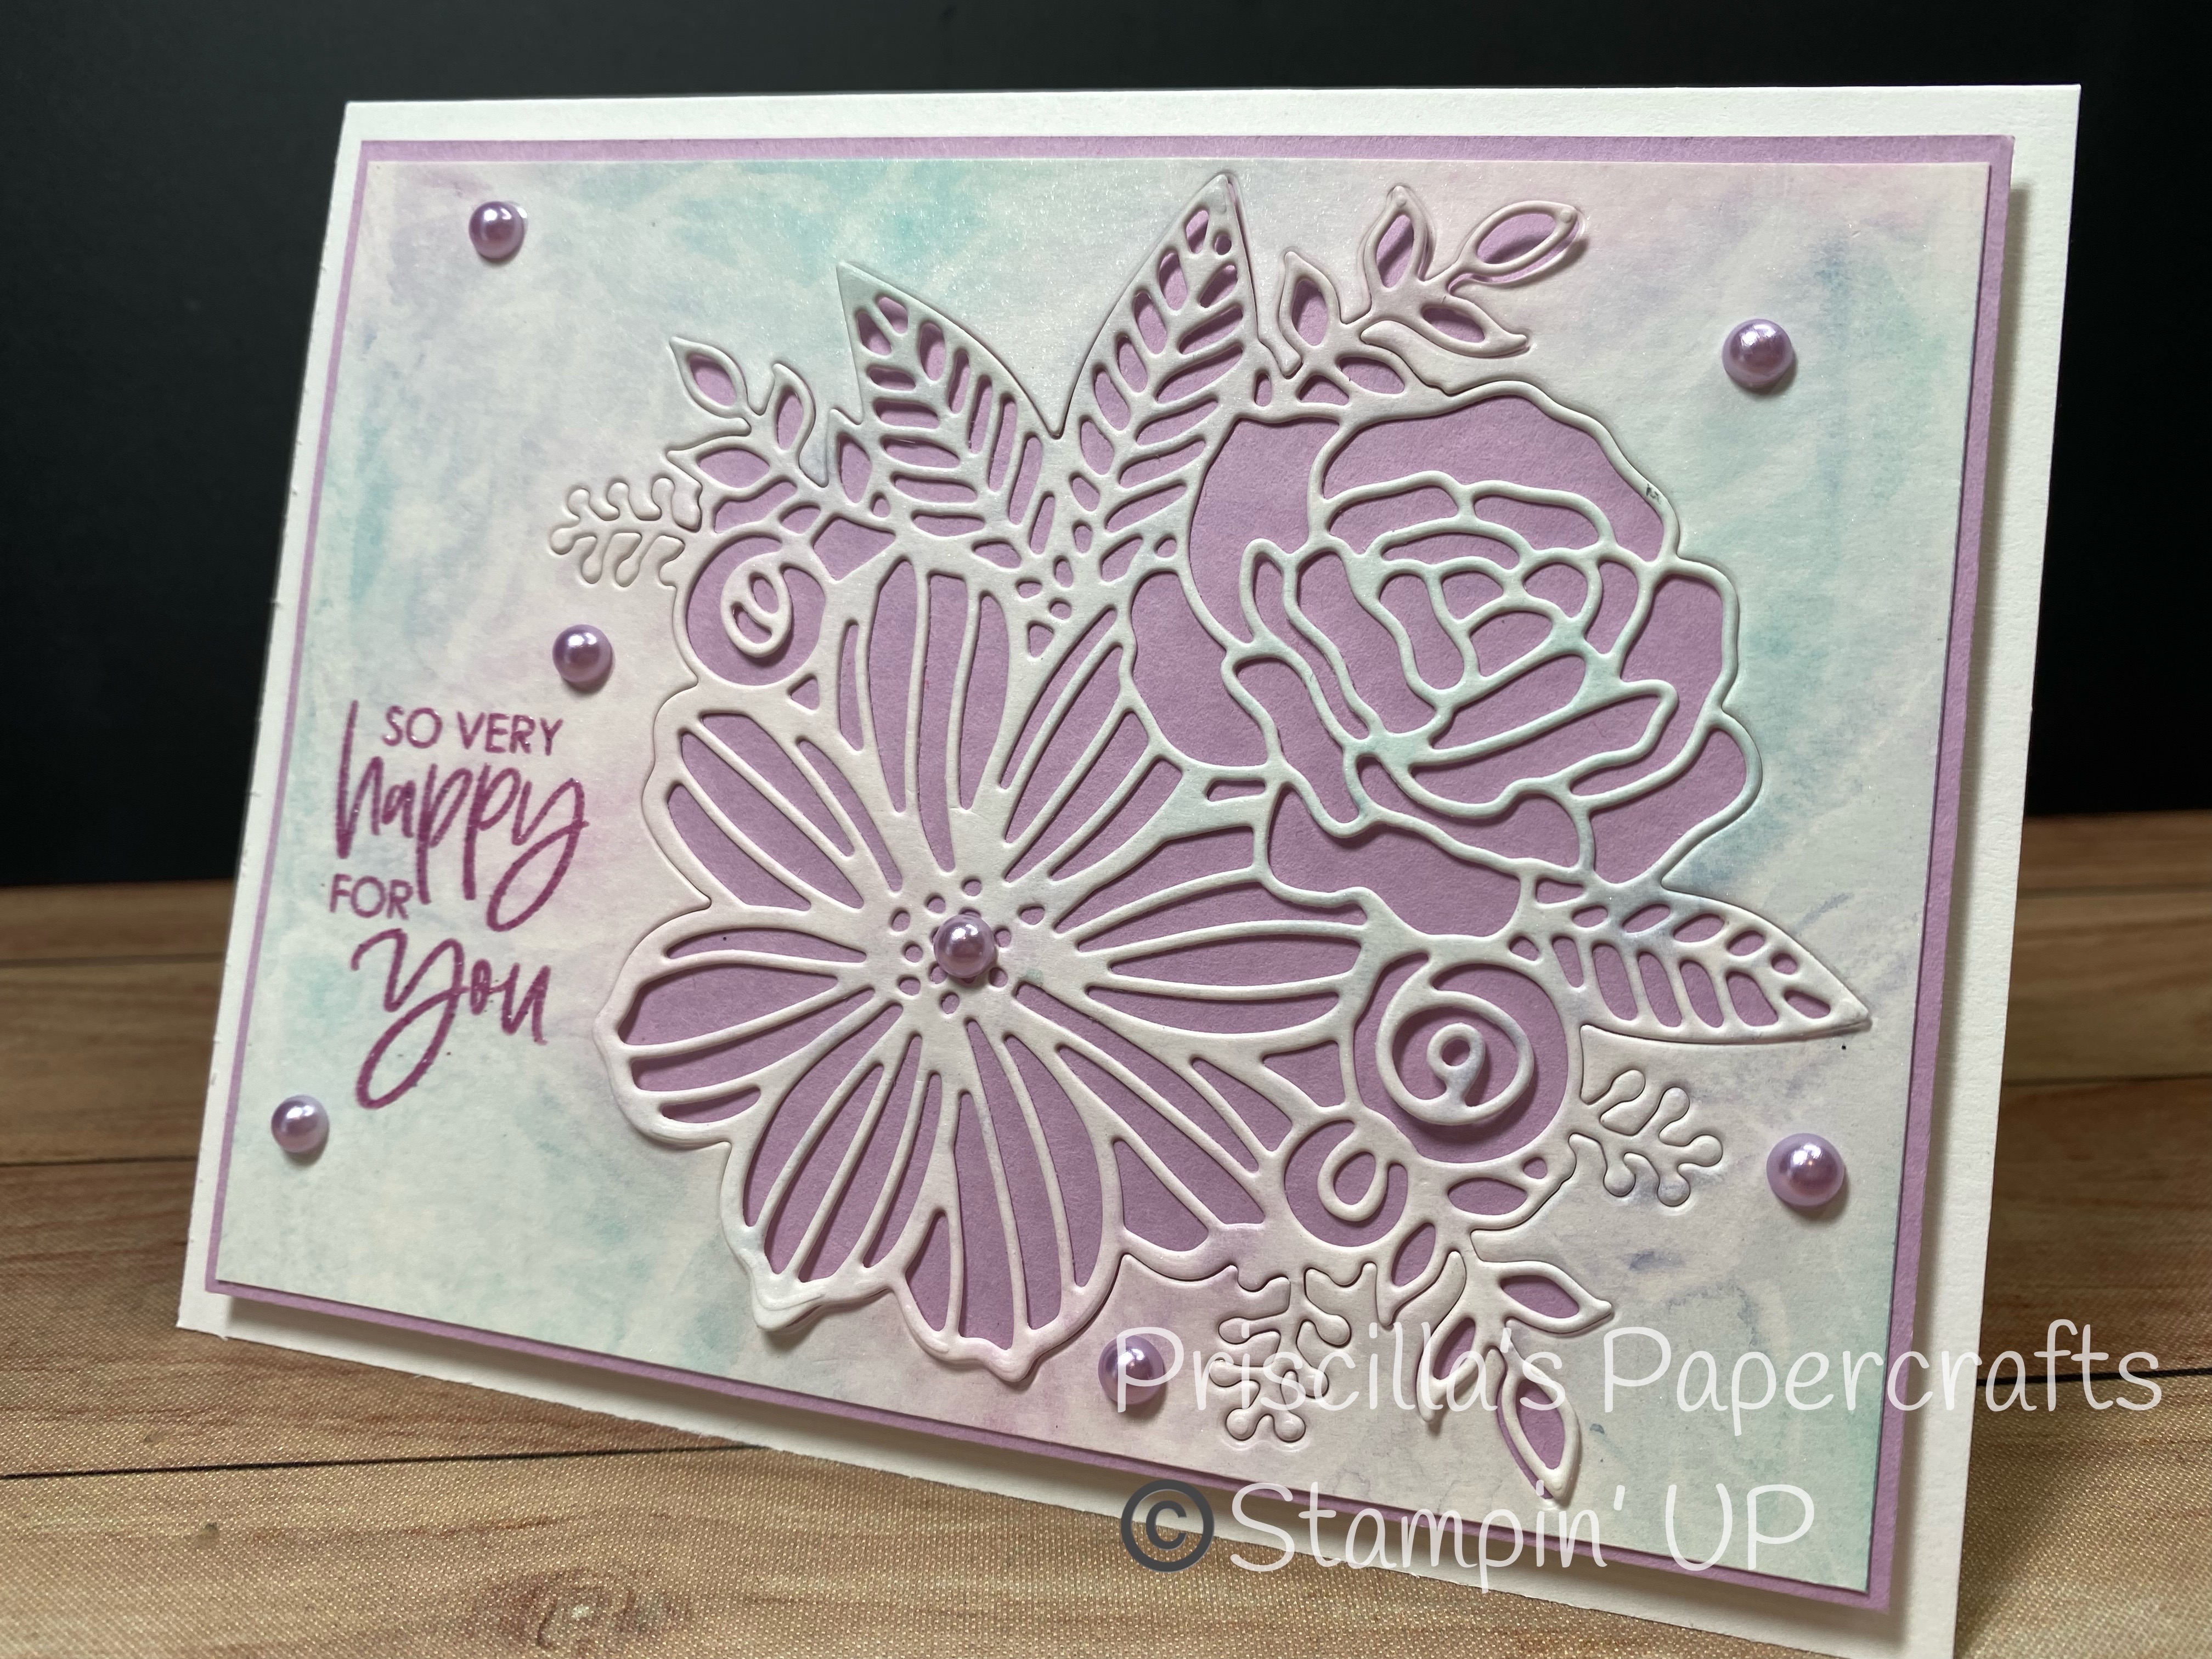
 Lots of good news this month!  I shared on Saturday that my nephew was getting married, and today I have a card that will be for his twin sister, who is having a bridal shower next week.  I'm spending the next few days in Southern California, but unfortunately I have to leave before the shower.  So I'm prepared - I have a gift being sent to my sister's home (where I'll be staying) and am bringing this card (Schuyler doesn't look at my blog 😕) so I'll be represented at the shower.  

And look how pretty and soft:


I saw a little video by Carol Brown on how to create this background using a piece of plastic wrap (like you wrap food in).  It's very easy, but so pretty!

Start with a piece of Shimmery White cardstock (I cut mine to 4-1/2" x 11" so I could choose the best area for my card), and add colors (your choice; I used Coastal Cabana and Fresh Freesia, but you can add more) using a Blending Brush.  Once you have the cardstock mainly covered with ink, take a piece of plastic wrap (larger than the size of your cardstock), mist it with water (Stampin' Spritzers are perfect for this technique, as they give you a fine mist and not heavy drops) and then carefully lay it on your cardstock.  Do NOT worry about wrinkles in the plastic wrap - the more wrinkles the better and you can gently "squish" the wrap around the wrinkles.  Set it aside and let it dry (leave the plastic wrap in place).  And you'll have something that looks like this:


Can you see the wrinkle lines?  And it you look near the bottom, by my watermark, you'll note some little "bubbles" where the water beaded up.  

Depending on how many colors you use, and how many wrinkles in your wrap, no two cards will be the same!  

Then it's time to create your card.


I cut the large die from the Artistic dies right into my pretty paper.  Then I adhered the paper (with a hole in it) to a layer of Fresh Freesia.  After punching all the little bits out of the die-cut, I reinserted it back into the hole it left, using Liquid Glue in strategic areas - I wanted a little dimension and didn't want the entire floral image flat.  


The greeting, from Color & Contour, was stamped with Fresh Freesia ink (using the Stamparatus) and then stamped again with Versamark.  This allowed me to use Clear Embossing Powder and heat set it for a shiny greeting.


Such a soft palette of colors, just perfect for a bride-to-be!  

And a fun technique - I hope you'll give it a try!


Product List 

Monday, May 23, 2022

Re-creating

Have you ever created a project and then lost the directions?  Well, that was what happened to me this weekend.

You see, last month for my Cards-by-Mail class, I created a card that one of my customers loved.  She contacted me to ask for measurements so she could recreate it at home.  "Of course", I replied, "I would be happy to send them"  

And then I couldn't find my measurements!  ðŸ˜®

I decided the best thing would be to re-create the card (fortunately, I had one in my box of cards) so I quickly made some measurements.  But of course, I wanted to be sure I had them right, so I thought I would make up a new one, just to be sure!  (And sure enough, I had to tweak them slightly!)

So here is a new card, using new products, with a March template:


 This is a pocket card.  The pocket, which does not open, holds a pull-out card for your greeting/thoughts/signature.

And since I hadn't used the Sun Prints designer paper lately, I chose two patterns from the pack in Gray Granite.  This is such an elegant collection of printed papers!


I stamped an image from Color & Contour and colored it with Stampin' Blends. The greeting is from Go To Greetings, stamped in Tuxedo Black.  


And look at those black, embossed sprigs above the square - those come from the neatest new product,  Twigs & Sprigs.  It's an embossing folder that has a coordinating die; once you emboss all the twigs and sprigs on your cardstock, you line up the die and cut out 10 sprigs!  So cool!


And that's how you make a Pocket card!  Why not give it a go?

Since I worked on this template for my customer, I thought I would share it with you.  In case you would like to try this on your own, here is a little diagram/card pattern:


It's not really difficult, as long as you have a good paper trimmer and can follow the measurements.  

Starting with a piece of 5-1/2" x 11" cardstock, score it at 3-1/2" and 7-3/4" along the 11" side.  Then measure up 3-1/2" from the bottom and make a tick mark (you will do this on both sides).  Place the paper in your trimmer so that the score line and the tick mark line up, and slice off the little triangle along the top two corners.  

You need two coordinating pieces of patterned paper.  One will be 3-1/4" x 5-1/4" and the other will be 2" x 5-1/4".  On the larger one, measure up from the bottom left corner 3-3/8" and make your tick mark - cut from the top right corner to your tick mark.  For the smaller piece, measure up from the bottom right corner to 4"; make your tick mark and cut from the top left corner to the tick mark.  This will give you the papers for the front of your card.  

Once the paper is applied, fold on the score lines to create a pocket.  The side with the smaller piece of patterned paper is under the other piece; place Tear & Tape adhesive along the bottom of the small side and close it.  Then place Tear & Tape along the side and bottom of the larger flap, and close to seal.  Now you have a pocket.

I hope you'll give it a try!  


Product List