Showing posts with label Go to Greetings. Show all posts

Thursday, April 20, 2023

Dual Happy Birthdays!

 In my Cards-by-Mail class this month I was featuring retiring colors.  We made a card in Polished Pink.   And I really like the card.  So when it was time to prep for my in-home class, I decided we would make the same card.  But...I ran out of Polished Pink.  Pivot - I had the same patterned paper in Fresh Freesia!  

Here's the original:


Isn't that pretty?  So bright and cheery with the black, pink and Mango Melody (another retiring color) balloons!

But when I had to change colors, I decided to also change the stamp set.  I felt the Fresh Freesia was more elegant, softer toned, and "quiet".  So:


I think I actually like this one better!  

Both cards have a Thick Basic White base.  And both have a layer of the coordinating color.  Then we added a Basic White layer that measures 3-3/4" x 5".  But we also added some DSP to the corners.  


This created a fake "banner" in the center.  The white center is just the white layer of the card.  But with the triangle corners, it looks like we stamped on a banner.

The patterned paper is the Country Gingham 6" x 6" DSP from the January - April 2023 Mini Catalog.  I think there is still some left, and you should grab it if you can!  With 48 double-sided sheets of gingham designs in 4 colors, you'll have lots of gingham to brighten up your spring and summer cards!

I trimmed the paper to 3" x 3" squares, and cut them in half on the diagonal.  Then we just adhered them to the Basic White layer.


That elegant greeting is from Go To Greetings.  Stamped in Gorgeous Grape, it coordinates beautifully with the Fresh Freesia.  

And tho balloons!  Cute!  Cut with the Celebrations Tags dies in Fresh Freesia, Highland Heather and Gorgeous Grape, they were embossed with the OnLine Exclusives Basic Embossing Folders. 

All that was left was to add some Glossy Dots in Gorgeous Grape for a little bling!


 Isn't it amazing how creating cards in different colors can make them look entirely different?  


Be sure to check out the Last Chance products list to see what discontinued items you can get at terrific savings!  Click here for more info. 

And be sure to look at the OnLine Exclusives!  The online only products will not be in catalogs, but can be yours if you shop online.  Find the link here.  


Product List

Friday, April 14, 2023

Good Hoarding?

Is there such a thing as good hoarding?  

So just imagine this:  starting to create with something you've had for months and haven't even opened yet (can anyone relate?).  Coming up with an idea, only to find that none of your current products match what you are trying to create.  So you go through ALL your "stuff" and bingo!  You find something you like...and then realize it's old and no longer available.  Do you use it?

Of course you do!  That's why you've kept it all this time.  And now you know how this card came about:


 Now first let me apologize for the photo - this specialty paper has foil accents and metallic ink, and it's very hard to photograph.  So you'll see some light reflection that I wish wasn't there, but no matter how I placed it, some light reflected.

Check out that paper in the center of the card.  I received a pack of the Dry Brushed Metallic 12" x 12" Specialty paper in NOVEMBER!  And here it is in April, and the package is unopened.  What's wrong with me?  The paper is retiring in 2 weeks!

Anyway...I decided it was high time to use it!  So I started by using one of the Radiating Stitches dies to cut a piece; then I used the larger die from the same set to cut a piece of Soft Succulent (retiring) as a frame.  This allows the paper to do most of the "talking" for this card.


The card base is Evening Evergreen (also retiring), and it all looked beautiful.  But I needed a greeting.  What to use...


After perusing ALL my paper, I came across a small stack of some brushed metallic papers that came in gold, copper and something like champagne.  I don't know how old it is, but I kept the unused pieces, and it looked like a good match.  So I cut the circle with another die from Radiating Stitches, and centered a punched piece of Evening Evergreen on which I had Copper-embossed a stamp from Go To Greetings.

But I still needed something...


So I cut some more of the copper with the Harvest dies (again - retiring) for a lovely little accent.  And finished with some Brushed Metallic Dots (NOT retiring!).  


And that's when I realized that I really do NEED EVERYTHING in my craft room!  ðŸ˜‰. I couldn't have completed this card without it all!  And I guess a little hoarding can be worth it!

Some of these products are still on the Last Chance list, but going fast.  Check it out here.  


Product List

Tuesday, February 21, 2023

What's a Quadrangle?

Quadrangle!  Such a funny name for a really great technique for making cards!   

So what's a Quadrangle?  Start with a piece of 6" x 6" paper (I used patterned paper on my card, but to show you how it's done, I drew the pattern on Basic White cardstock):


Measure 1-1/2" from each corner, and then cut on the diagonal lines.  This will give you 4 angled pieces, all the same size.  Perfect for making multiples of the same card.

So here's the card we made in our Card Club this week:


See the Quadrangle?  I cut a piece of the FREE Favored Flowers Designer Series Paper (FREE during Sale-a-bration with a $50 qualifying order).  Once I had a 6" x 6" piece, I measured off 1-1/2" from each corner and cut - netting me 4 identical pieces.  


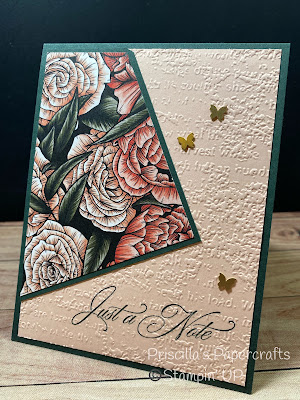
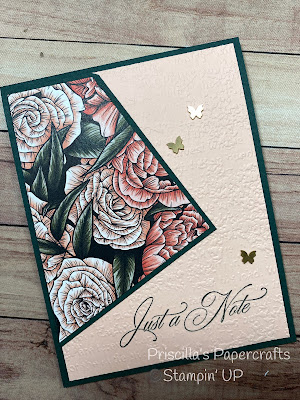
The greeting, from Go To Greetings, was stamped in Evening Evergreen on Petal Pink; then it was embossed with the Timeworn Type embossing folder.


A truly simple, classic design that is so striking!  Don't you agree?


Quadrangles - a funny name for a pretty technique! 


Counting down the days before Sale-a-Bration ends - just 7 days left to get your FREE items with qualifying purchase!  Do you have everything on your Wish List yet?  


Product List

Monday, January 30, 2023

Celebrating Sale-a-Bration

How about a week of ideas using products from the Sale-a-Bration brochure?  You ARE aware that Sale-a-Bration is going on now, right?  And that for every $50 order made, you get to choose a FREE item from the brochure?  

Well let's take a look at some of the products that you could choose with your qualifying order.  I'll have samples all week using many of those products.

Starting with...drumroll...Dainty Flowers 12" x 12" Designer Series Paper!  This beautiful paper is pretty enough to stand on its own for a card front.  But it coordinates with the Dainty Delight Bundle in the January - April 2023 Mini Catalog.  The bundle (stamps and dies) is $54.75 - enough to earn you the FREE Dainty Flowers paper!  

For my project today, I only used the FREE paper, along with some cardstock and stamp supplies.  The Dainty Designs paper is the star of the show:


For this set of notecards, I only used ONE sheet of the Dainty Designs paper.  Just ONE!  This particular piece has floral designs on the top and bottom edges of the paper - cut the paper in half at 6", then trim each half in 4"  x 5-1/4" pieces and voila!  SIX cards!  Let's take a closer look:


Mounted on Mossy Meadow cardstock and stamped with Framed Florets in Mossy Meadow ink.


Another Framed Florets greeting, this time in Rich Razzleberry, and mounted to Blushing Bride cardstock.


This greeting, from Color & Contour, was stamped in Rich Razzleberry, which is also the card base color.


One more Framed Florets greeting, again in Rich Razzleberry on a Rich Razzleberry card base.


Not only is the paper from Sale-a-Bration, this card features a greeting from Beautifully Happy - a FREE stamp set during SAB with a $100 purchase!  I used Mossy Meadow ink and cardstock.


Go To Greetings provides the sentiment, in Rich Razzleberry on Blushing Bride cardstock.

And then:


Each card has a matching envelope.  I simply added a strip of the designer paper to the envelope flap and trimmed around the edges.  It's a beautiful way to coordinate and finish off your card/envelope!

But I couldn't stop:


I created a box using Rich Razzleberry for the box bottom and the DSP for the to lid, tied it up with a Natural Finish Ribbon bow, and added a sweet tag:


Cut from the matching DSP, I used the Celebrate with Tags dies and Go To Greetings to create the tag.  And inside:


This is going to be a birthday present for a neighbor.  A simple, yet beautiful box of notecards and matching envelopes.  

Who wouldn't love to get this?  

Don't miss out on Dainty Flowers DSP - available only while supplies last, and this item will sell out quickly!  Click here to see SAB options.


Product List