Showing posts with label Petite Petals. Show all posts

Saturday, July 9, 2016

Stamps - Not just for Stampin'

I have a friend and customer who has taken stamping to a whole new level.  Nancy is an avid crafter who loves to stamp, but she is also a fabulous jewelry maker.  And she just showed me a necklace I  have to share!  Take a look:

Nancy used the Petite Petals stamps, and actually made this gorgeous flower necklace with an amethyst in the center.  Isn't that beautiful?

This sterling silver flower is one of the stamps from this set, and it is so lovely!  She has used other stamps and embellishments for rings and earrings, but she blew me away with this.

You can have one for yourself; contact Nancy at geminid.designs@gmail.com

And leave her a message here--I know she'd be thrilled to hear your comments. 

Sunday, May 11, 2014

Happy Mother's Day!

To all my "mom" friends, I wish you a happy Mother's Day!  Here's little eye candy for  you to enjoy on this special day:

Some of you have already seen this beauty; in fact, SOME of you have actually made one!  This was a sample from my Over the Top class last month, and I've been saving it until today to publish it. 

This beautiful "Card in a Box" was made using current Stampin' UP items, some of which are on the retired list, but still my favorites. 

The back of the card, when the recipient (my daughter--a wonderful mom!) opens it, has  a space on which to write a note.  The stems are from Happy Watercolor, and are colored using Blender Pens and Wisteria Wonder and Pear Pizazz inks. 


The box is covered in the yummy Designer Series Paper Afternoon Picnic.  Then lots of flowers were stamped from Flower Shoppe and Petite Petals in Wisteria Wonder, Coastal Cabana and Crushed Curry, all punched out using the Pansy and Petite Petals punches.  Easy Peasy!

Flowers and leaves from the Little Leaves Sizzlet--soon to be retired (**whimper**) are adhered to the "cross beams" of the card using Mini Glue Dots.  

The sentiment from Something To Celebrate was stamped in Wisteria Wonder and the end of the paper was "flagged".  A butterfly was punched with the Bitty Butterfly punch from Champagne Glimmer Paper and adhered with a Dimensional

This card folds flat for mailing--imagine the surprise when it all "pops" open to display a beautiful garden!

I hope you enjoy your special day...


All supplies can be ordered here.

Let's get creating!


Tuesday, March 11, 2014

Happy Birthday, Holly!

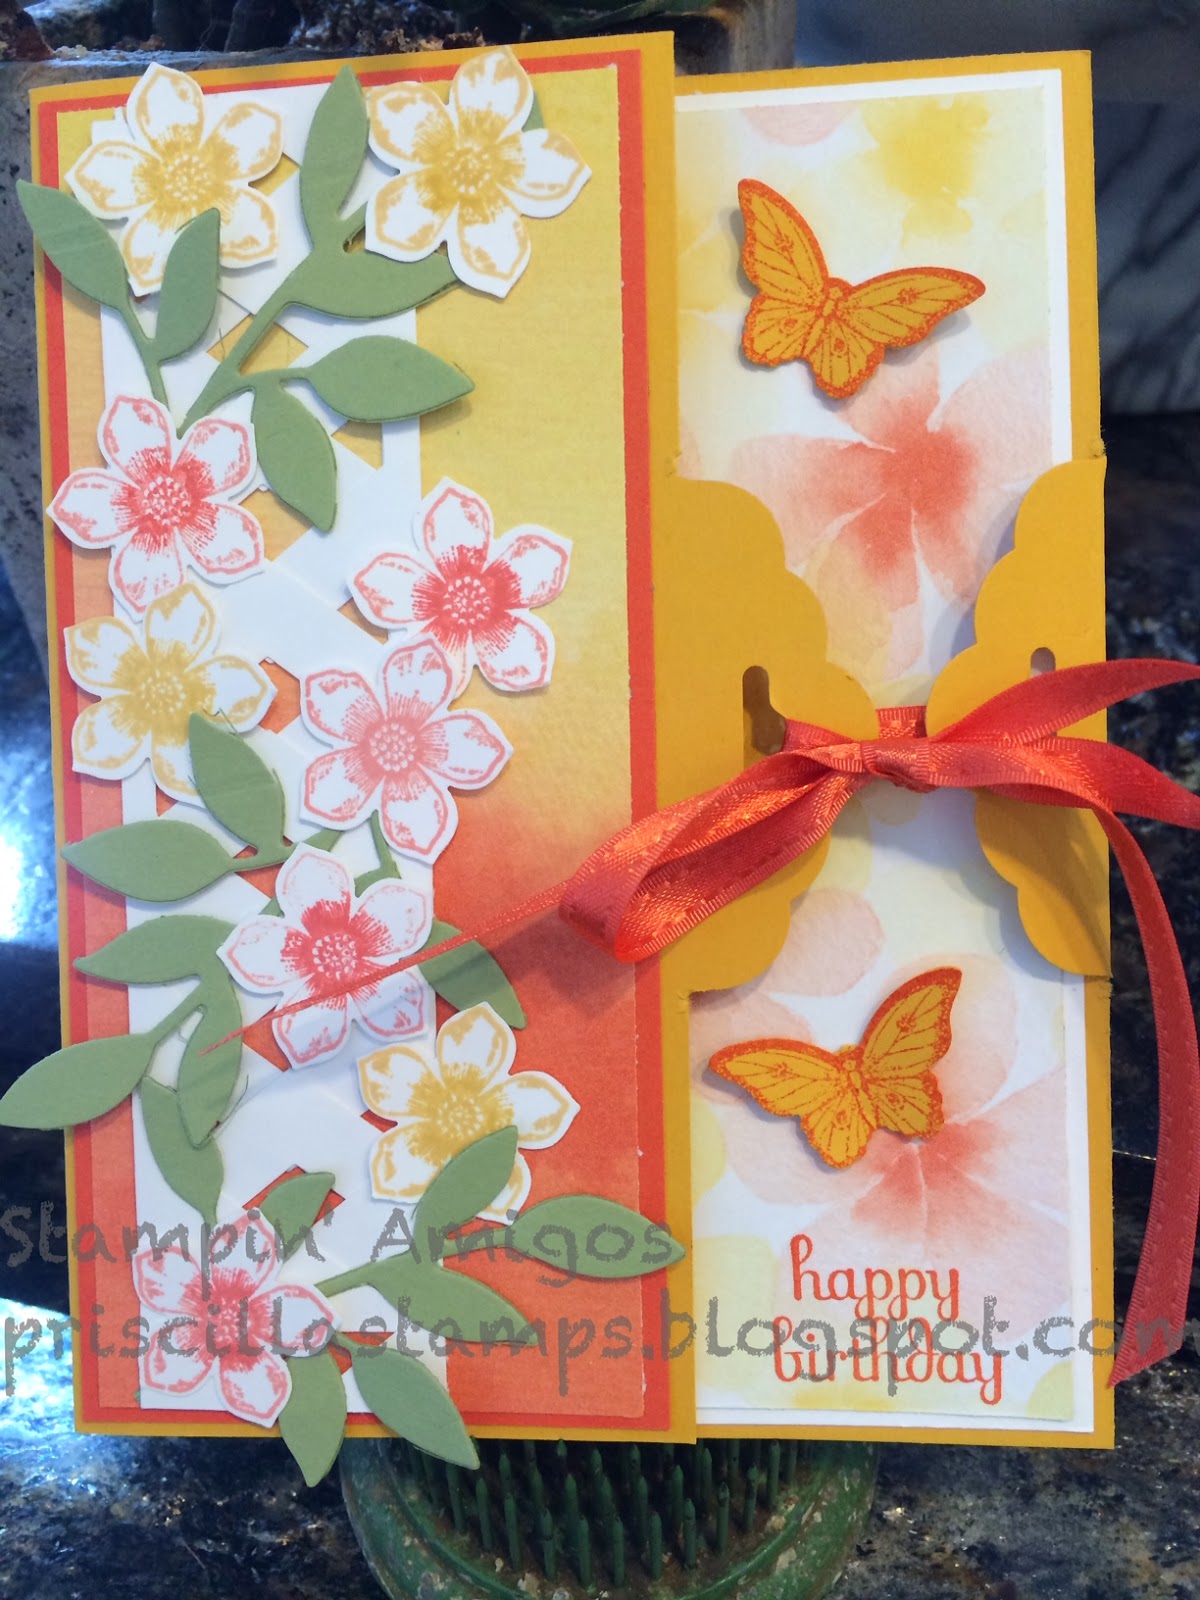
Today is my sister's birthday!  More than a sister, she's my best friend, so here's a special card for her:
Lots of punches going on here (and no, I have never punched my sister, even though there were days when we shared a bedroom that I sure wanted to! *grin*). 
This started with the Chevron Punch, with which I made the lattice for the flowers.
Punch one row of chevrons, then a second one.  Layer them over each other, and "push" the top piece through the bottom layer, overlapping the points of the chevrons and creating a lattice.  It's fun to slide the two pieces back and forth, widening the lattice until you get the look that's just right for your card. 

The lattice was lightly (but securely) adhered to a layer of Watercolor Wonder Designer Series Paper from the Occasions Catalog.  I then cut several Little Leaves from the sizzlet and stuck them through the lattice.  Next came a lot of flowers from Petite Petals, stamped in Tangerine Tango, Crisp Cantaloup and Daffodil Delight, and punched with the Petite Petals Punch.  These were adhered with Mini Glue Dots.  This entire layer was adhered to another layer of Tangerine Tango.

Now the fun part of this card is the ribbon closure. 
This is made using the 
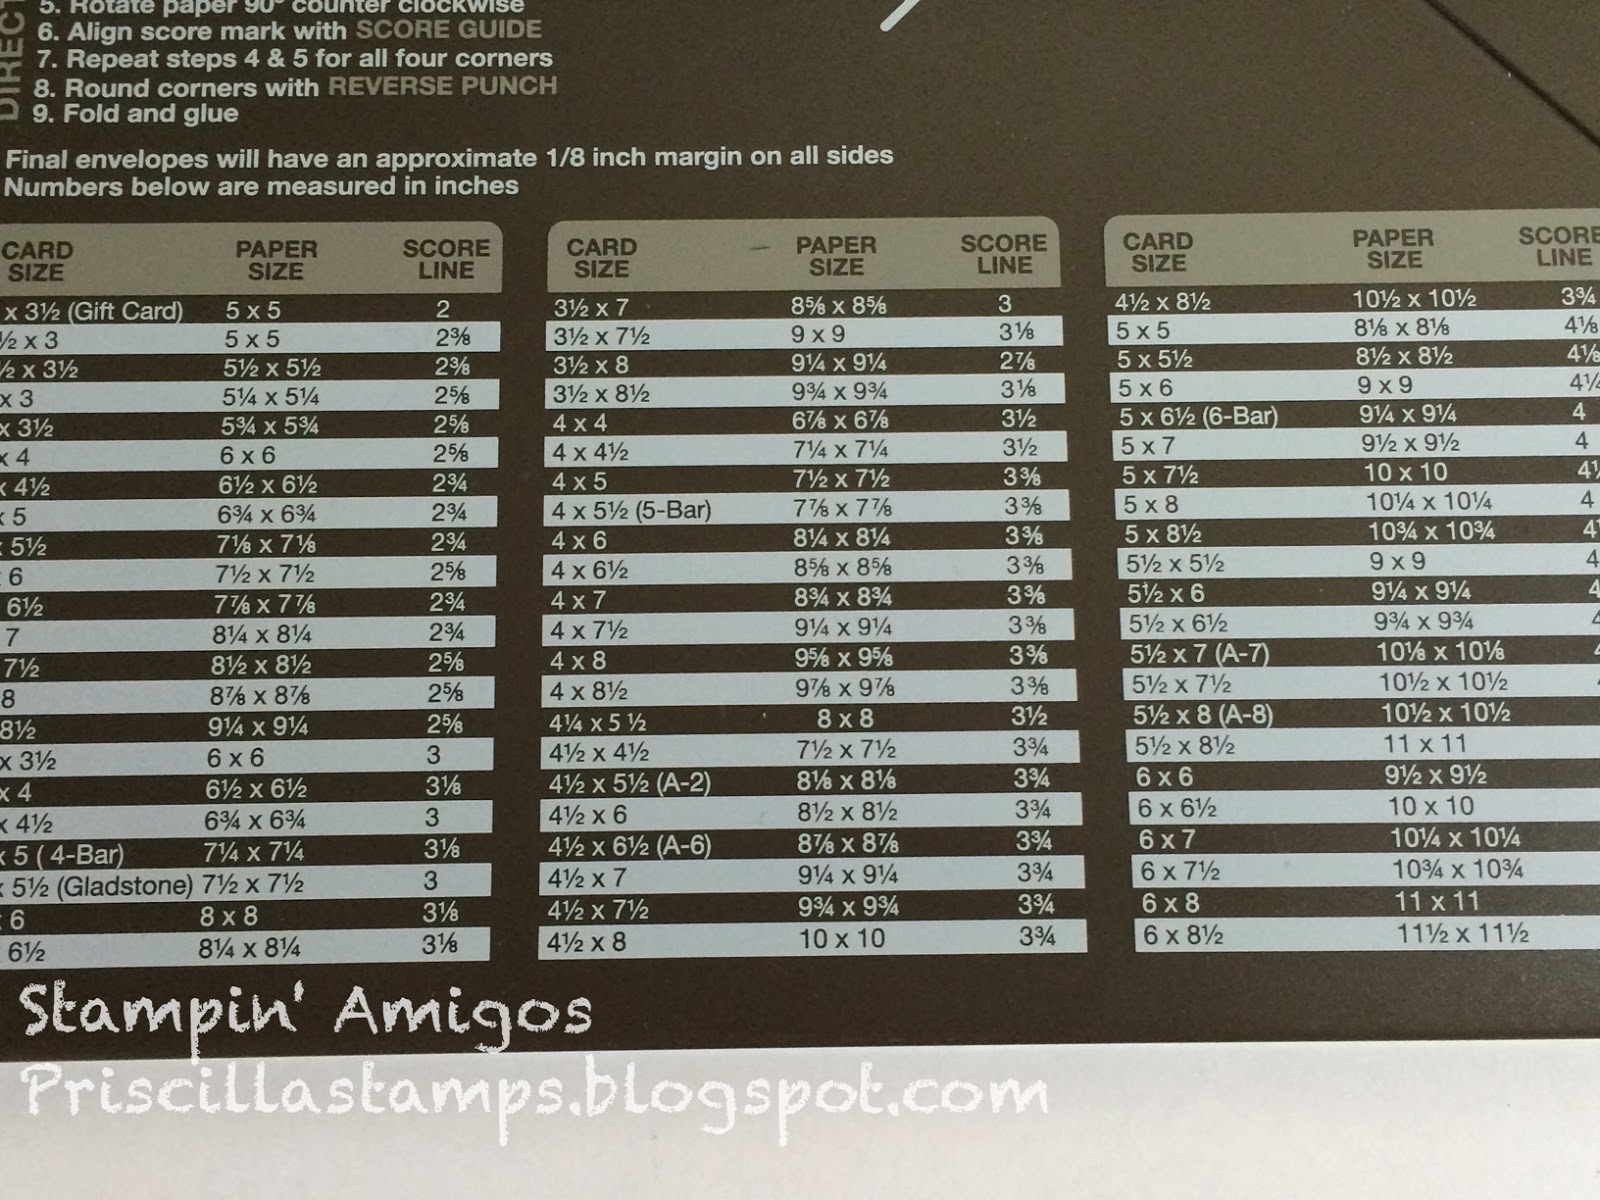
Scallop Tag Topper Punch.  It's easy to do, first making a light tick mark at the 1" mark, then sliding your card stock (Crushed Curry used here) all the way into the punch, using the tick mark as a guide at the edge of the punch.  Punch, and flip your card stock over; repeat.  Remove the excess tabs created when you punch, and score along the base of one of the scallops, then score your card at 4-1/4".  Easy peasy!  And makes such an elegant closure.

Another piece of coordinating Watercolor Wonder DSP (with flowers that go with my little punched ones) was layered on the Whisper White of the inside of the card, and some small butterflies were stamped (Papillon Potpourri) in Tangerine Tango on Crushed Curry, and punched with the Bitty Butterfly punch.  These are adhered with Mini glue dots. 
Enjoy, from Simply Celebrate, is stamped in Tangerine Tango on the inside, and the card is closed with a piece of vintage Tangerine Tango ribbon. 

An elegant, beautiful, and fun card for my special sis...Happy Birthday, Holly!

All products used can be purchased at my on-line store, here.

Let's get creating!


Sunday, February 23, 2014

A Time for Sympathy

My daughter-in-law's Grandma Millie recently passed away at 90-years young.  I'd met Millie on many family gatherings, and I know she'll be missed.

I happen to be one of the luckiest mothers-in-law I know, as I consider the parents of both of my DILs friends.  So when I heard about Millie's passing, I knew I had to send a card to the family.

I saw a card like this on Stampin' Connection, a demonstrator-only website, and decided it would be perfect as a sympathy card.
The Hardwood background stamp is so beautiful!  I truly looks like a wooden fence or door or side of a barn.  Stamped in Early Espresso on Sahara Sand cardstock it became a delightful background for a lattice of flowers.  The lattice is punched from the Chevron punch; two strips were layered to create the fence.  This is then decorated with a bunch of Petite Petals in Calypso Coral, Crisp Cantaloupe and Daffodil Delight, all punched with the Petite Petals punch.
Leaves of Garden Green were cut, using the Little Leaves Sizzlet (love this one!) as well as from the Bird Punch
One of the framelits from the Chalk Talk set was just the right size for my sentiment, from Love & Sympathy.  Stamped in Garden Green on Whisper White, it's then layered on Garden Green and Crisp Cantaloupe cardstock, all cut from the same framelit (can you guess how I layered them?  Just cut the colored ones in half and line them up). 
Now because I let the flowers run off the edge of the card, I had to make a slightly-oversized envelope.  Have you seen the Envelope Punch Board yet?


This nifty little tool is one that MUST be part of your collection!  It makes envelopes in 66 sizes!  From small to large, just about all your envie needs will be met! 
So easy to use!  Choose your envelope size and note the "paper size" column; cut your paper and
use the lines to place, punch and score your envelopes.  So easy!  And you can make your envelopes to match your cards (as I did here using the Regals Designer Series Paper Stack in Garden Green). 

The Envelope Punch Board is not in our annual catalog yet, so if you are interested, head over to my on-line store and enter Item Number 133774; just $19.95 for one of the coolest tools you'll own!

Let's get creating!