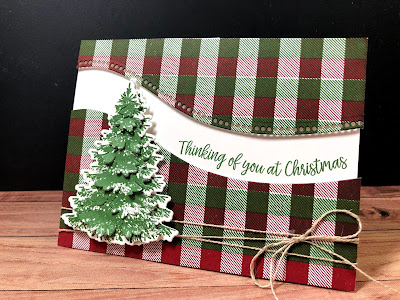
I love a little plaid at the holidays, don't you? Somehow that warm, wooly blanket feel makes me all cozy. So how about a little plaid for today's Merry Monday?
I don't know about you, but this screams "Christmas" to me! 🤶
So how did I get that plaid background? Buffalo Check! A large, background stamp, and my Stamparatus. I started by inking up the stamp (mounted to my Stamparatus) with Cherry Cobbler ink; once stamped to my liking (I had to stamp a few times to fill in all those squares, but it's easy with the Stamparatus) I stamped it on a piece of Window Sheet. Then I moved my stamped cardstock under the Window Sheet until my new color (Garden Green) was in the blank spots, and stamped again (and again) using the Garden Green. It worked perfectly!
Next I used the new Curvy dies (coming in the January - June Mini Catalog, but available now in the Quite Curvy Bundle) to create the curved edges. And stamped the greeting directly on the card base.
Isn't that tree fabulous? It's from Winter Woods, and stamped twice with Garden Green ink. Then I cut them both with the In The Woods dies, using both the outline die (for the bottom tree) and the detailed tree die for the one on top, which was stacked with Dimensionals for a 3D tree. LOVE!
And look at the inside:
In keeping with the "curvy" look, I stamped the images (from Curvy Christmas, available now!) using Garden Green and Cherry Cobbler inks.
Someone's going to receive a cozy, curvy Christmas card this year!


I love the plaid on this and the dimension of the tree. Did you use the window sheet on the card as a layer or just used it as something to help you line things up on the stamparatus? I absolutely love this card!
ReplyDeleteThanks for asking, Michele! I used the window sheet to help me figure out where I wanted the Garden Green ink. Once I stamped with Real Red, I stamped on the window sheet. I kept the window sheet in place in the Stamparatus and slid the card stock below until I had the color in the white space. I anchored the card stock in place, removed the window sheet and stamped in the second color, filling in the white squares. Hope this helps clarify!
ReplyDelete