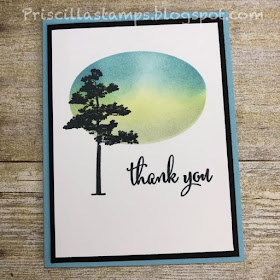
Gorgeous! And really easy!
It all starts with a template. Taking a piece of Window Sheet (I cut mine the same size as the card front, 4" x 5-1/4") use a die to cut the oval. Here I used the Layering Ovals dies, but you can use circles, squares, hearts, anything!
Lay the template over your card front (Whisper White, Very Vanilla, Glossy, or Shimmery White are best); you'll want to be sure the template doesn't move - some Washi Tape can hold it in place. Then using sponge daubers, ink the sponge, tap off some of the excess ink, and begin coloring in the negative space of your template. Here I used Balmy Blue, Lemon Lime Twist and Soft Sea Foam. Lay down the color lightly - you can always add more color, but you can't take it away. Sponge in small circles, gradually working your way around the template and blending the colors where they overlap.
When you like what you see, remove the template - be careful - there may be some ink on the outside edges, so lift straight up. Set your template aside, and admire your beautiful, water-colored shape.
This is a simple, beautiful card, good for any occasion. Give this "watercoloring" technique a try!


No comments:
Post a Comment