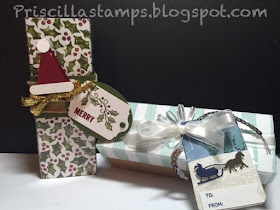
Today I want to give you a little more detail about what I did to make this special.
These boxes use the Tag a Bag Gift Boxes, which are wonderful, food safe, boxes that come with acetate sleeves. They are essentially good to go, but you can have lots of fun decorating them.
This box was dressed up using the Season of Cheer Designer Series Paper. I cut a piece the same length as the box, with a 1" overlap on either side. The corners of the DSP were rounded with the Project Life Corner Rounder and I scored each side at 1". Then I just laid the paper over the box and slipped it inside the sleeve.
The box was tied using White Organza Ribbon. Under the knot, I slipped a 3/4" circle with Silver 1/8" ribbon looped over it, and then I added some Silver Sequins.
But it's the tag that makes this special:
I first cut a piece of Whisper White Thick Cardstock with the Chalk Talk Framelits. I sponged "sky" using Marina Mist and Night of Navy inks. I then used my Sleigh Ride Edgelilts to cut Dazzling Diamonds Glimmer paper and then cut another one of the trees using Lost Lagoon, and the sleigh from Night of Navy. The horse was cut using Early Espresso. I carefully trimmed the trees, sleigh and horse, and adhered them right over the original piece.
Very soft and sparkly gift packaging.
Then I took another box and stamped it using the mistletoe stamp from Embellished Ornaments. I covered it with another piece of Season of Cheer DSP:
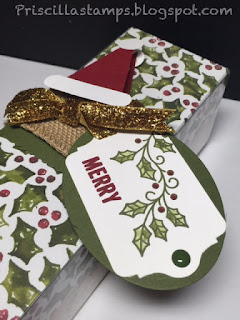
And I decorated the acetate sleeve using Mossy Meadow cardstock, Burlap Ribbon and a sparkly piece of Glitter Ribbon.
The tag (another Chalk Talk Framelit) was stamped and colored and added to a Mossy Meadow oval:
I finished it off with a Home for Christmas Enamel Dot embellishment and a cute little Santa hat (it uses a SU Clothespin to hold it in place).
So I'm already getting a head start on my holiday wrapping! Yippee!
All products can be purchased here.


No comments:
Post a Comment